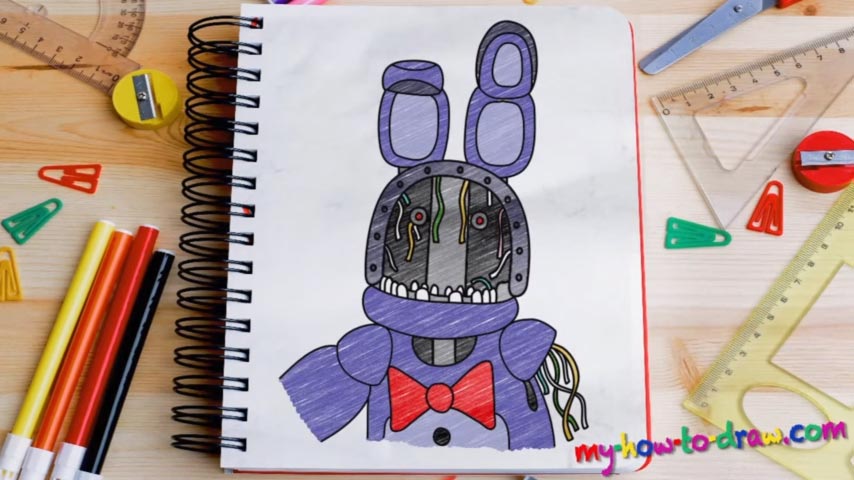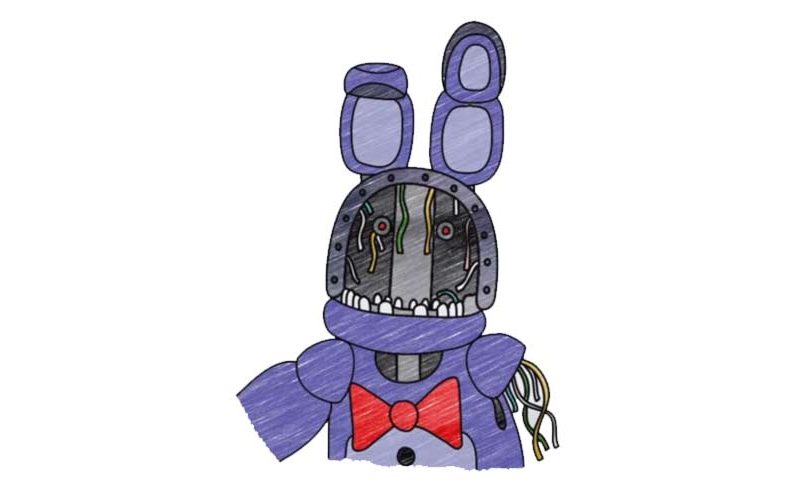
Learn How to draw Withered Bonnie FNAF Quickly & Easily!
It shouldn’t really matter whether the drawing is sophisticated or not. As professionals, we follow the rules and achieve great results. Therefore, this how to draw Withered Bonnie FNAF tutorial begins with the rough sketch (00 min 22 sec). You’ll need a half-a-circle and an oval right below it to imitate the character’s head. Then, go ahead and add the ears (00 min 36 sec).
The right one is bigger than the left one, by the way. The last part of the sketch is the hands. And while the left hand is safe and sound, there are wires hanging out of the right one. Use a set of circles and a long oval shape to complete the guidelines. Now we switch to darker strokes and get to the next part of the how to draw Withered Bonnie FNAF tutorial.
First of all, go over the sketch for the head and make sure everything’s clean and smooth (01 min 07 sec). The next step is the teeth that will frighten even the toughest men out there (01 min 26 sec). They come in different shapes and sizes, and you’ll have to be accurate and try to do everything exactly like you see in the video. The eyes are the easiest part (02 min 14 sec). Same goes for the wires hanging out from the inner side of the head.
Once you’re done with those, move on to the ears (04 min 07 sec). If you kept the proportions right when putting in the light strokes, you’ll be alright. The final parts of the how to draw Withered Bonnie FNAF tutorial are the bowtie and the hand (05 min 11 sec). The left hand is pretty straightforward. The right one, on the other hand, also has wires coming out – lot of them (05 min 47 sec). Basically, they’re just a combination of S-like curves.
Before you learn how to draw Withered Bonnie FNAF, did you know?
As you can see from the picture, most of this character’s face is gone and we can take a look at its “skeleton”. Big chunks of its shoulder and hands are missing. Plus, there are tons of wires poking out and numerous holes all over its body.