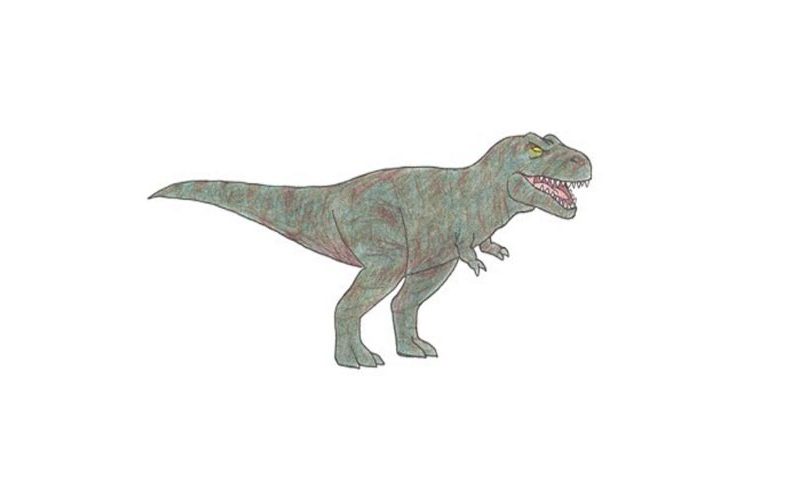
Learn How To Draw A Tyrannosaurus Rex Quickly & Easily
Begin with the predator’s eyebrow (00 min 08 sec). In order to make it look scarier, curve it up and down. Once it’s in place, add an identical line right above it (00 min 24 sec). The eye, the next step in this how to draw A Tyrannosaurus Rex tutorial, is a horizontal oval (00 min 30 sec).
That half-circle below it is for the skin (00 min 41 sec). The mug is pretty simple: it’s like a long rugby ball (01 min 05 sec). The nostril sits in the middle of it (01 min 33 sec). The triangle-like teeth follow. The lower half of the mouth should resemble a slightly tilted V-sign (01 min 56 sec). Then, add another row of teeth, equally sharp.
See the line below the teeth? It’s there for the jaw (02 min 42 sec). Use two curvy lines to cover the neck (03 min 02 sec). The tiny hands come with two fingers each (03 min 30 sec). The gigantic legs and the tail are the final parts of the how to draw A Tyrannosaurus tutorial (04 min 03 sec). The legs look a bit like they belong to a goat. The tail is nice and long, like a dagger (04 min 56 sec).
Before you learn how to draw A Tyrannosaurus Rex, did you know?
This big, scary, and deadly dinosaur became incredibly popular thanks to the Jurassic Park movie franchise. According to the experts, in the real world, the T-Rex wasn’t nearly as strong, but in the JP series, it was the king of the jungle. This beast used to rule over America millions of years ago.
Tyrannosaurus Rex was a carnivore creature, meaning its diet mostly consisted of the meat of other animals (herbivores, to be exact). That long, heavy tail served as a great balancer for the huge head. The size of an average T-Rex was 12 meters long and 3.5 meters tall. As an apex predator, this animal had no rivals on the planet.
