Learn How To Draw Winnie The Pooh Quickly
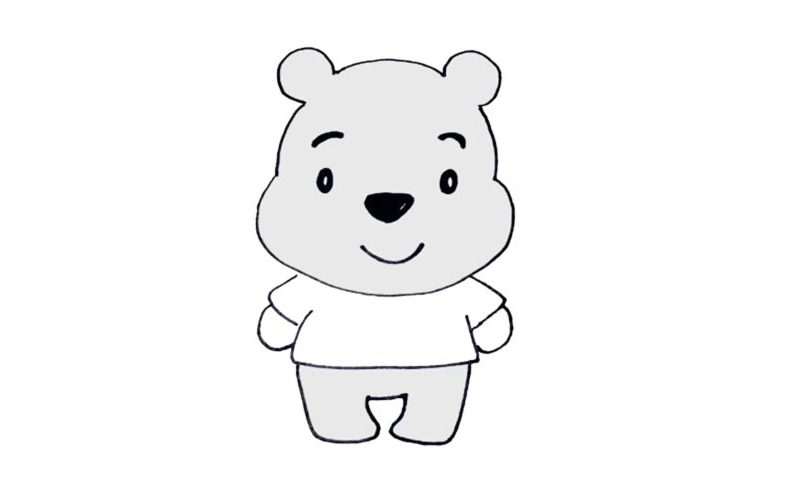
The bear’s head looks a lot like a big pot (00 min 07 sec). Add the lower half first and only then move up to the top. The identical ears sit on both sides, giving us that classic image of a cartoon bear (00 min 15 sec). The eyes, the next step in this how to draw Winnie The Pooh tutorial, are incredibly tiny (00 min 25 sec). The nose should be colored black.
Make sure the brows sit in the middle between the eyes and the top of the head (00 min 48 sec). You’ll need two thick curves for them. The mouth is like a reverse copy of the brows. Ok, the head, the hardest part, is behind us. Let us focus on the body and bring this home. Winnie has a regular shirt on (01 min 02 sec). The hands have no fingers.
The feet, the last part of our how to draw Winnie The Pooh tutorial, are pretty short compared to the head, but of the same height as the body (01 min 15 sec).
Before you learn how to draw Winnie The Pooh, did you know?
This guy needs no introductions. It’s safe to say that almost every single person living on planet Earth knows about Milne’s iconic character. This anthropomorphic bear was first introduced to the world back in 1926 – almost 100 years ago – and is still alive and kicking. The original stories by Milne were translated into numerous languages, including Latin.
The author’s son, Christopher, had a teddy bear, and the writer was inspired by it to create a series of short stores featuring that bear. By the way, you can find that exact teddy in a public library in New York. What started out as a story to tell to a kid at night has turned into a global phenomenon. And even though kids have iPhones and iPads to entertain themselves these days, a good story is still in high demand.
