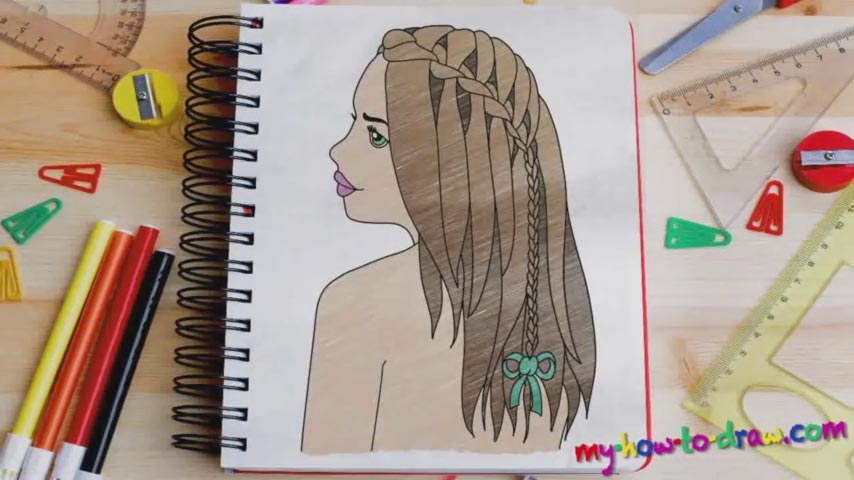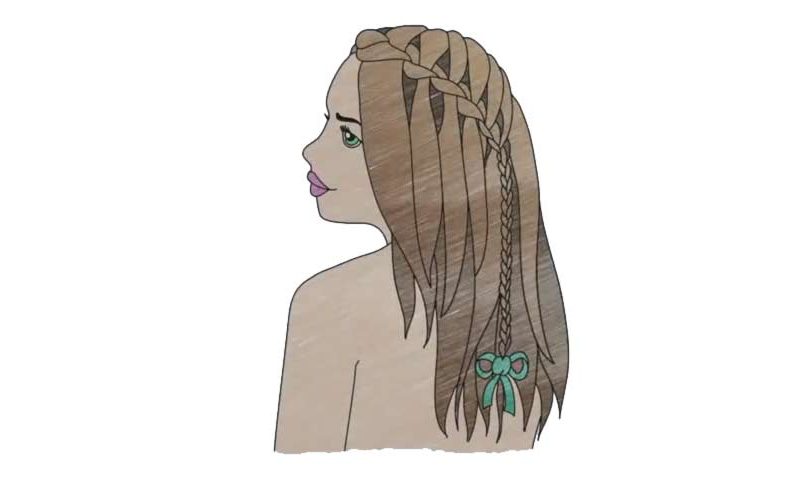
Learn How to draw Waterfall Braids Quickly & Easily!
It’s safe to say that you won’t be able to get everything right without a proper rough sketch. So, don’t rush into battle and let’s set up some guiding lines first (00 min 23 sec). That curvy line that stretches from the top of the paper to the bottom is the center of this how to draw Waterfall Braids tutorial. The rest of the shapes and lines come after it.
As you can see in the video, I didn’t spend much time on the rough guides – just enough to mark the important spots. The real work starts when you leave the light strokes behind and use darker ones. At first, it might seem to be extremely hard to handle the hair, but once you go through the tutorial a couple of times, you’ll get it. We begin at the very top (01 min 24 sec).
The further down you go, the more sophisticated the hair will become. But if you really want to learn how to draw Waterfall Braids, you’ll have to get every last detail right. There’s no point in describing all the lines and curves here because it’s more of an intuitive thing. If you’ve got a female friend that can pose for you, that’d be great, because nothing compares to the real thing.
When you’re done with the first stage, move on to the long pigtail (04 min 39 sec). It’s actually pretty easy once you get to it. Don’t forget about the ribbon (06 min 49 sec). Keep adding more hair lines until you’re satisfied. The last part of this how to draw Waterfall Braids tutorial is the face (09 min 08 sec). Follow the guidelines and draw the nose, the mouth, and the eyes. And that’s it, ladies, and gentlemen!
Before you learn how to draw Waterfall Braids, did you know?
Do you love how that beautiful hair looks? Well, after this tutorial, it will be so much easier to do the same with your own hair (if you’re a girl, of course). It’s not as hard as it looks, and there are countless tutorials out there that will teach you how to do this easily in the real world.