Learn How To Draw The Number 2 Quickly
This drawing is all about the right angles. The entire thing consists of several huge lines and curves. Begin in the upper left corner with a big half-circle (00 min 08 sec). Another curve at the bottom will complete the top of this how to draw The Number 2 tutorial (00 min 16 sec). I know, it looks like a sausage right now, but that’s about to change.
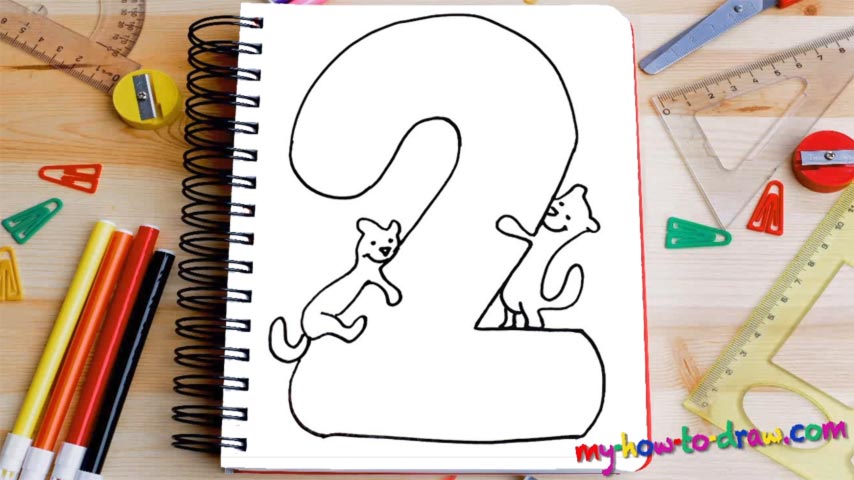
See those parallel lines (00 min 25 sec)? Make sure they are nice and straight. The cute doggies come next (00 min 38 sec). The brute on the right is giving the number a hug and looks quite adorable. The legs are super short. The nose and the eyes are just three dots. Same goes for the dog on the left (01 min 17 sec).
Only it’s lying on the other side and is feeling pretty great about itself. The faces are almost identical. To complete this how to draw The Number 2 tutorial, move to the lower half of the paper and use a simple curve to cover the bottom (01 min 40 sec). Ok, now we’re officially done – both with the number and with the dogs!
Before you learn how to draw The Number 2, did you know?
Number 2 is everywhere: we put it on our doors, dial in our phones, and type on our keyboards. Along with 1, 2 is considered to be the most popular and frequently-used number by the humans. In Judaism, it has a strong presence. For example, God ordered Noah two put pairs of animals into his famous ark of salvation.
Furthermore, the biblical Ten Commandments were handed out in not 1, but 2 tablets. In sports, this number is also used very often. The Institute of Marriage tells us that family is a sacred thing, and when two people – a man and a woman – come together, they create a new life, and that’s something that the Almighty wants us all to do.