Learn How To Draw The Dove Of Peace Quickly
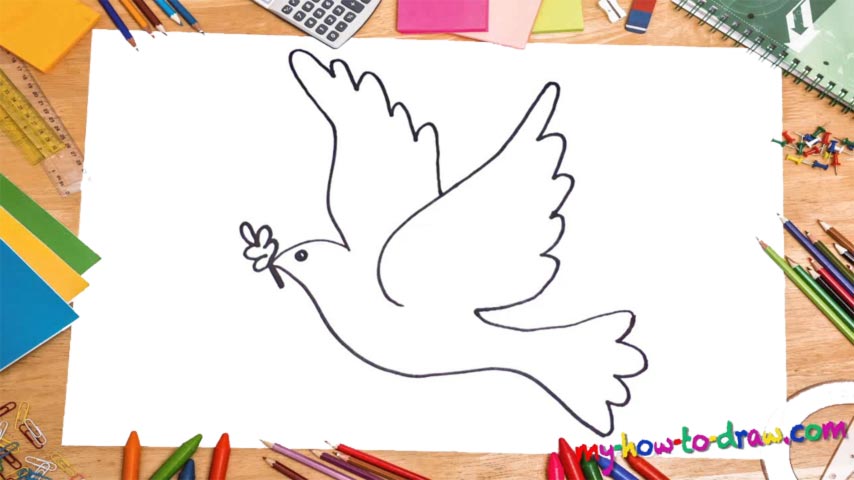
If you’ve been looking for a quick and easy tutorial featuring a bird, this is your lucky day! In this video guide, we’ll learn how to draw the Dove Of Peace in just one minute. Start with the head and use one big, curvy line to complete the bottom of the drawing (00 min 07 sec). The tail in the back comes next (00 min 16 sec). It’s made up of four “waves” on top of each other.
Once those are done, go ahead and complete the upper half of the birdy (00 min 20 sec). Stop approximately half-way to the head. The “dip” should be approximately the same as in the bottom. If that’s true for your composition, get to the wing (00 min 28 sec). It’s quite tall. The wing is nice and curvy on the left side and have the same waves as the tail on the right.
Obviously, the bird has two wings, and the second one is the next step in this how to draw the Dove Of Peace tutorial (00 min 42 sec). It starts at the right edge of the head and also comes with five waves. Ok, we’re almost done. The last things to add are the olive leaf and the one and only eye (00 min 55 sec).
Before you learn how to draw The Dove Of Peace, did you know?
During the Middle Ages, these birds were used as messengers and/or as symbols of hope, love, and peace, especially during war. They have a strong presence in most of the major religions of the world and are featured in many books, movies, and TV shows.
The Bible says that after Noah successfully survived the flood, he released a dove for it to find land and save the man’s family and the animals. The Christians consider the doves to be a symbol of the Holy Spirit and believe that God himself turns into a dove every once in a while to look over his people.