Learn How To Draw An Ovni Or Flying Saucer Quickly
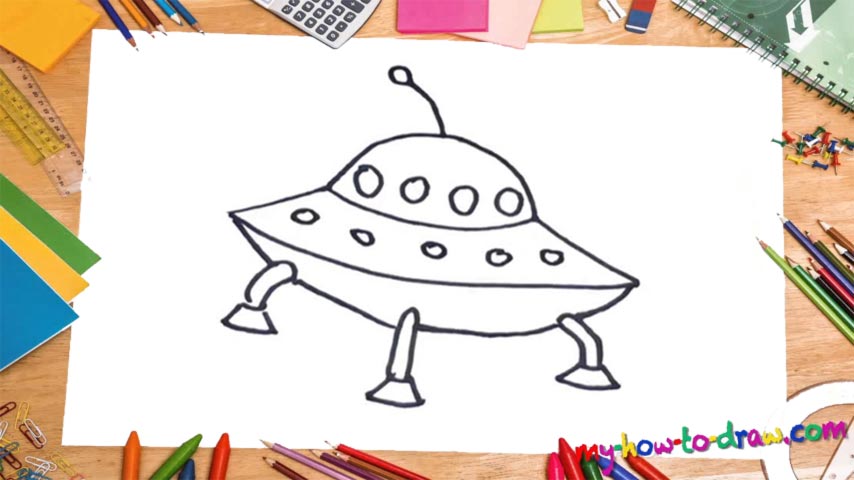
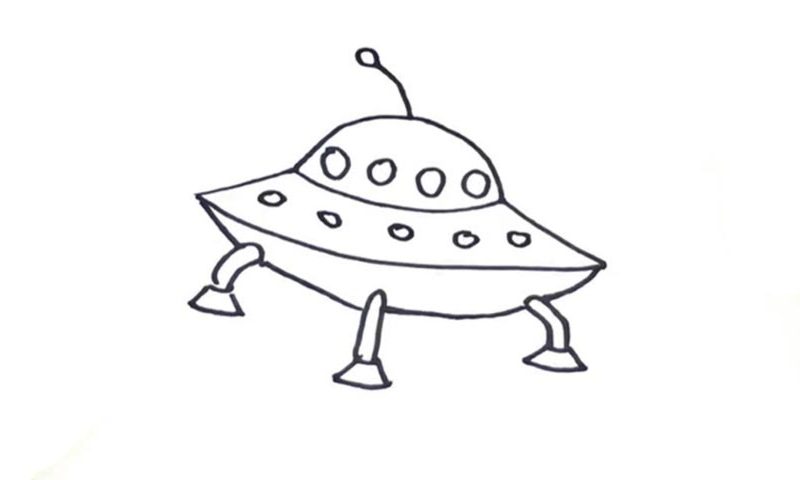
The part in the middle comes first in this video (00 min 07 sec). It’s a very simple shape with a dip in the middle and a combination of straight and curvy lines. Once you’re done with the intro to this how to draw an Ovni Or Flying Saucer tutorial, go ahead and add the top “floor” by using one single curve (00 min 23 sec). It already looks like the real thing, right?
Some folks would’ve stopped at this point, but we’re about to go even further! There are four windows on this level – put them in before moving on to the next stage (00 min 28 sec). The antenna on top of it follows (00 min 35 sec). It consists of a curvy line with a tiny oval shape on top – that’s it. The “legs” are the next step in this how to draw an Ovni Or Flying Saucer tutorial (00 min 42 sec).
We’ve got three in total and they’re pretty standard. I bet you’ve seen them in numerous books and movies. Connect the legs to each other with a curvy line that covers the bottom of the spaceship. The windows on the first floor are the last thing to take care of (01 min 10 sec). They are much smaller than the ones on the second floor.
Before you learn how to draw An Ovni Or Flying Saucer, did you know?
Are you a fan of sci-fi and books/movies/TV shows/games that feature aliens? If the answer is yes, then you’ll most definitely appreciate this tutorial. Even though there is no documented proof that alien races exist, humanity has been thrilled by the idea since the early days.
What if we’re not alone in the galaxy? What if there are other creatures that fly around in these funny spaceships? Could they be more advanced than us? And what would their plans for us be? Those are the questions we keep asking, and this image of a saucer is a classic.