Learn How To Draw Squirtle Quickly
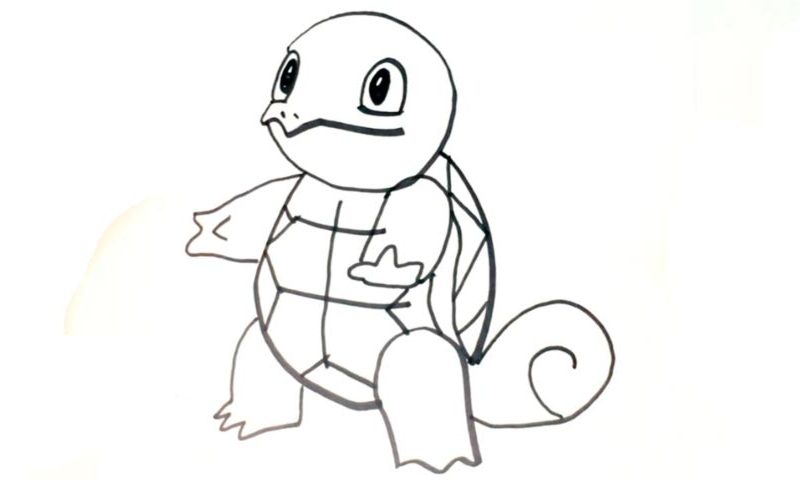
This is a very simple drawing, one that we’ll complete in less than 3 minutes. Start in the middle of the paper with a nice and round circle (00 min 07 sec). Leave some space in the left corner for the facial features, though. The mouth/beak sits in the lower corner (00 min 17 sec). You’ll need two tiny dots for the nostrils (00 min 27 sec).
The huge eyes are the next step in this how to draw Squirtle tutorial (00 min 33 sec). They look like window frames with tiny black ovals inside of them. Alright, we’re done with the head; let’s move on to the body. You’ll need two simple vertical lines for the main part (01 min 04 sec). Once they are in place, focus on drawing the limbs (01 min 17 sec).
The legs and hands are very primitive and look very much alike. If you’re happy with those, go back to the body and add the turtle-like texture that looks like a shield (01 min 55 sec). The tail completes this how to draw Squirtle tutorial (02 min 31 sec).
Before you learn how to draw Squirtle, did you know?
The Pokemon have taken over our world – that’s not even a discussion. They started in Japan, and after the Asian markets were conquered, the people behind these majestic creatures decided to move to the West. Today, the entire world knows about these brutes. As for Squirtle, it’s special, mainly because it never evolved, which is still a mystery.
Red and Green, the video game, introduced Squirtle to the fans, and since then, it has been a regular character not only in games, not also in animated movies and merchandise. This Tiny Turtle can walk both on two and four feet, depending on the situation or the current mood. When threatened, it hides in its shell and “attacks” the enemies with water from the mouth.
