Learn How To Draw Groot (Baby Groot) Quickly & Easily
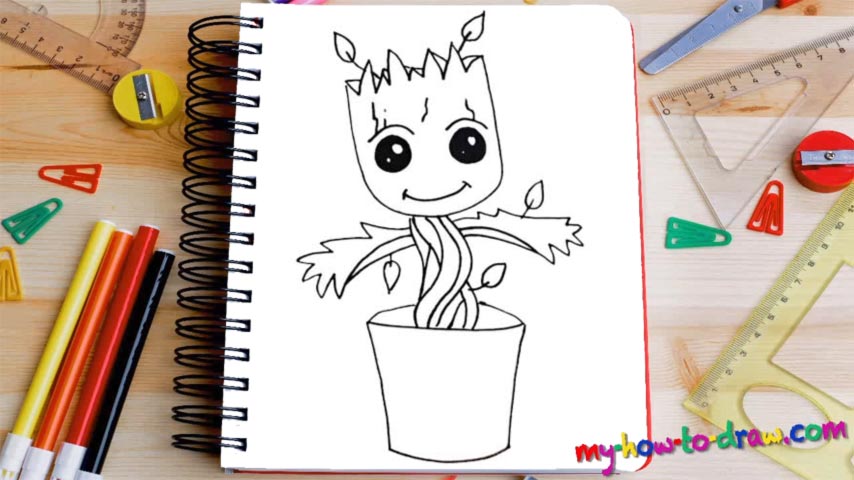
The pot comes first (00 min 06 sec). There’s nothing hard about it, as it’s quite basic. Our hero, however, is pretty sophisticated and will require your attention. Get to the main part of this how to draw Groot (Baby Groot) tutorial with the trunk (00 min 29 sec). It consists of several similar curves that form a realistic image when combined with each other.
The head is pretty huge and takes up most of the space on our paper (01 min 04 sec). The top looks like a bunch of zigzags (01 min 16 sec). That will help us accentuate the fact that this is, indeed, a tree. Once it’s in place, don’t forget to add those cute leaves on top (01 min 40 sec). Ok, now it’s time to proceed with this how to draw Groot (Baby Groot) tutorial and take care of the facial features (01 min 52 sec).
Start with the eyes. They’re very similar to each other and should be colored black with two tiny circles inside each. After you add the brows and the “cracks” above them, draw the funny mouth at the bottom (03 min 12 sec). The final stage is the hands (03 min 21 sec). Doesn’t that baby tree look absolutely adorable?
Before you learn how to draw Groot (Baby Groot), did you know?
The beautiful thing about comic books is that the artists are not limited by any restrictions. They are free to come up with the most ridiculous characters, and every once in a while, something truly awesome happens. Baby Groot is, of course, one of those examples.
He comes from a different planet and originally, this tree-like creature wanted to experiment on the humans. But when the Guardians of the Galaxy came around, he joined their cause and became one of the good guys. His “I am Groot” is now an iconic line.