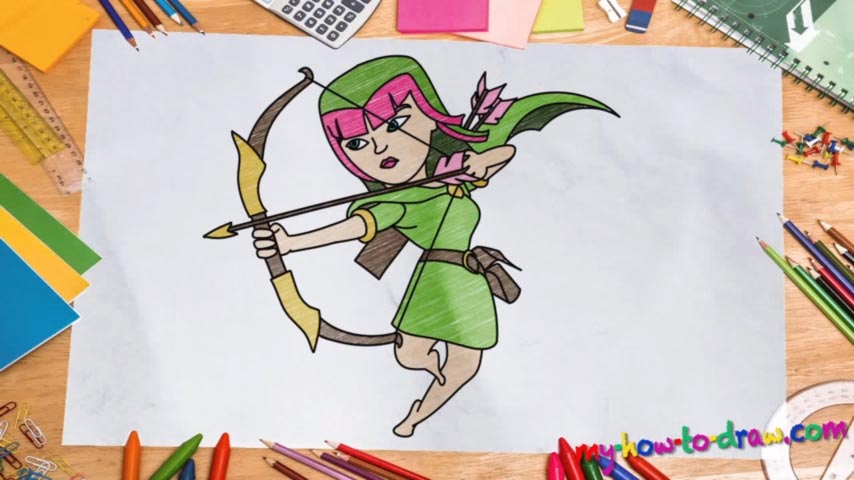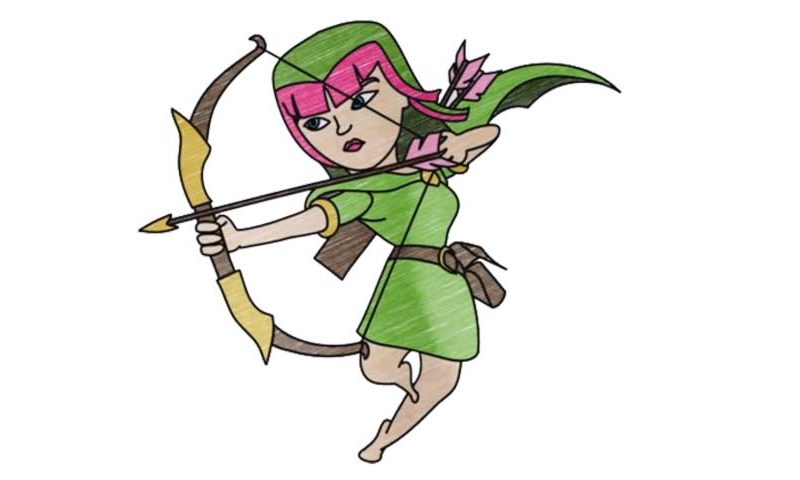
Learn How to draw Clash Of Clans Archer Quickly & Easily!
The hardest thing about this video-course is getting the girl’s pose right. So, start this how to draw Clash Of Clans Archer tutorial with the head and let’s make our way down from there (00 min 23 sec). Once you’re done with that, create a curvy line for the body. Next, draw a series of tiny circles and connect them with a line like you see in the video (00 min 42 sec).
The final parts are the rest of the body and the legs (01 min 06 sec). Finally, go back to the “pack of circles» and add a huge curvy line for the bow (01 min 26 sec). That’s actually it for the rough sketch, ladies, and gentlemen. Now we get to learn how to draw Clash Of Clans Archer. The tiny perky eyes come first. Then, add the nose and the mouth. The facial features are the easiest part (01 min 57 sec).
That cute mask is the next step (02 min 12 sec). Follow the video closely and make sure you get the size right. Ok, now off to the hardest part – the bow (03 min 14 sec). Those circles we drew earlier are for the girl’s hand, which means the lines for the crossbow should start above them. The fingers holding it are easy; and, if you did everything right with the light strokes, the rest of the arm will be a piece of cake.
Again, use the guiding lines for the gorgeous bow (05 min 30 sec). It’s really cool, isn’t it? Alright, we’re officially done with the hardest part of the how to draw Clash Of Clans Archer tutorial! You’ll need two arrows behind her back (06 min 43 sec). And a cute bag right next to her belt (07 min 43 sec). The rest – the lower body and the legs – is easy.
Before you learn how to draw Clash Of Clans Archer, did you know?
She’s fast, agile, fearless, and makes wonders happen with that bow and arrow. As a female warrior, she’s constantly being underestimated by men, and that actually gives the archer an advantage. With a sharp set of eyes and years of experience, this girl is a force to be reckoned with, that’s for sure!