Learn How to draw Angry Birds – Blue Birds Quickly & Easily!
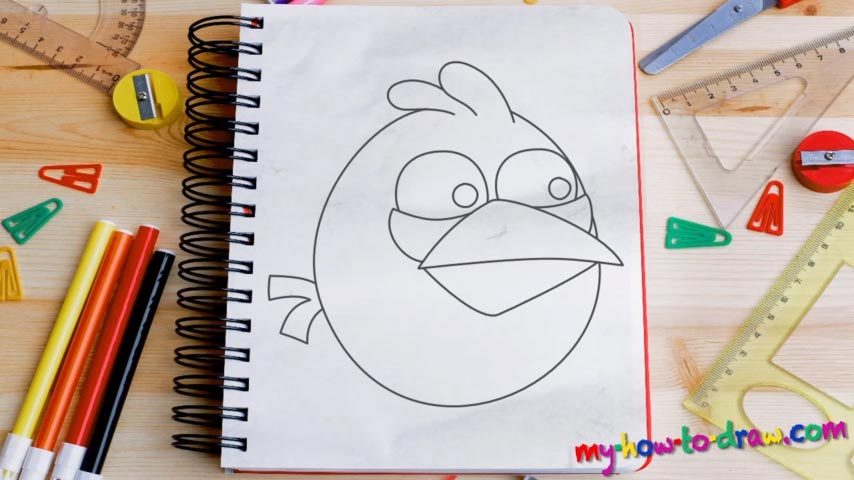
They always stick together and never leave home without each other. Tiny, cute, and full of life, these bright creatures are a sight for sore eyes. We begin this how to draw Angry Birds – Blue Birds tutorial with the beak, just like the rest of the guides dedicated to this game’s characters (00 min 28 sec). It consists of two identical shapes (of different sizes) that look like an origami. The eyes also look very much alike (00 min 59 sec).
All you’ll need for them are two circles: big ones that sit on top of the beak and tinier “stones” inside those circles. After you’re done with the crest, use an oval-like curve for the head (01 min 35 sec). Keep an image of an egg in your head and try to create that exact shape for this lovely bird. On the right side, it should overlap a bit with the beak and the eye.
Go over this part of the how to draw Angry Birds – Blue Birds tutorial multiple times until you get it right. If you make the head too smooth, the character will lose some of its charm. At the same time, if you go with an overly oval shape, that will also ruin the final result. And before we finish this manual, draw the tail/wing in the left corner (01 min 50 sec).
Before you learn how to draw Angry Birds – Blue Birds, did you know?
Do you know who these guys are? Only the most adorable birds in the world! As siblings, they look identical and have the same kind of attitude, which makes it impossible to know which one you’re dealing with at the moment. Fun is in their DNA, and they know how to party.
Playful, cheerful, and full of life, the Triple Js never lose their spirit and can light up the mood even when Red is in the room. Along with the leader of the tribe, they are the most popular characters of the Angry Birds franchise and are here to stay.