Learn How to draw Angry Birds – Red Birds Quickly & Easily!
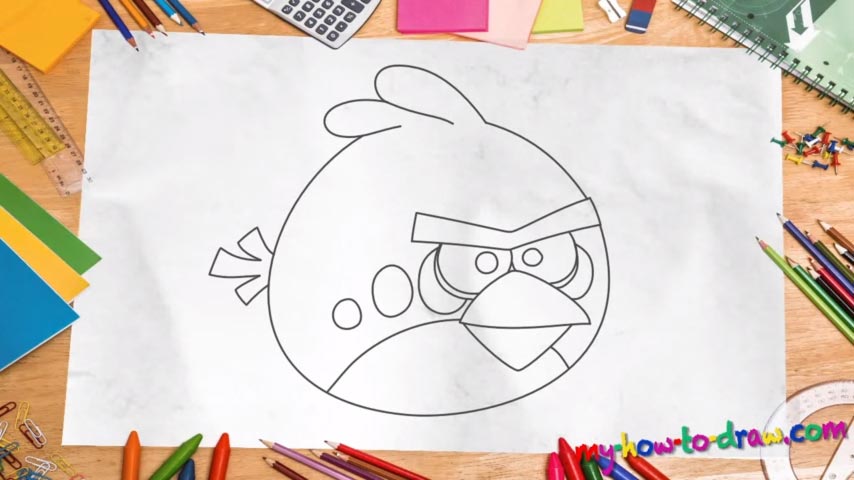
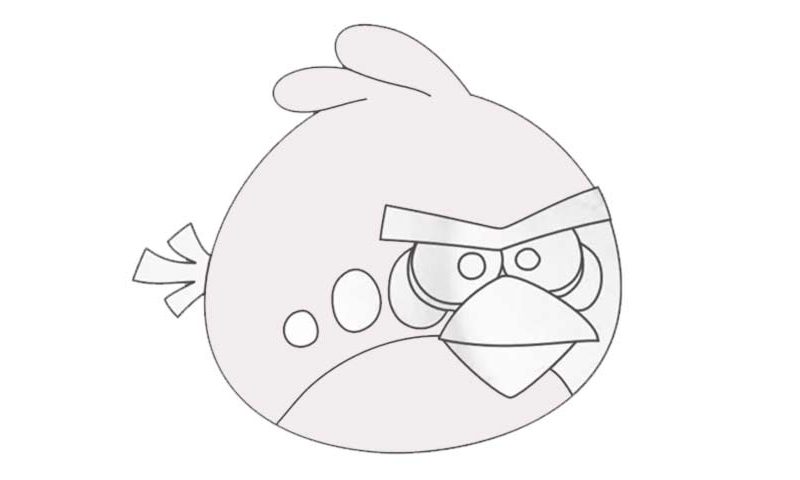
Wanna have some fun and learn an important drawing technique or two? If the answer is yes, then you came to the right place! In this how to draw Angry Birds – Red Birds tutorial, we’ll get up close and personal with the leader of the world-famous characters. We start with the beak (00 min 27 sec). Basically, you’ll need two identical triangle-like shapes that sit on top of each other (the one in the bottom is significantly smaller, though).
Does everything look good so far? Ok, use a simple rectangular shape to imitate the bird’s eyebrows (00 min 45 sec). The eyes follow. They look identical and sit right between the brows and the beak. If you’re happy with how everything looks, jump to the top corner of the paper to add the hair (01 min 34 sec). It consists of two super-smooth shapes but gives the drawing just the right vibes.
Once those are in place, draw a huge circle/oval for the head (01 min 44 sec). Without a doubt, this is the most important part of the how to draw Angry Birds – Red Birds tutorial. Please keep in mind that it’s not a perfectly round shape and looks more like a potato or a radish then, say, an egg. The wing on the left is the final step (02 min 03 sec). Wait, don’t forget about those trademark circles on both sides of his eyes!
Before you learn how to draw Angry Birds – Red Birds, did you know?
If you’re familiar with this chart-topping and record-breaking game, then you don’t need us to explain all the details about the main characters. But if you’re new to Angry Birds, let’s take a look at Red. He’s got the biggest brains and the heart of a lion.
However, his bad attitude forces the other birds to “evict” him. But when trouble comes looking for their lovely island, they beg Red to return home and lead them to victory. The outcast agrees and does everything in his power to protect the island and defeat the invaders.