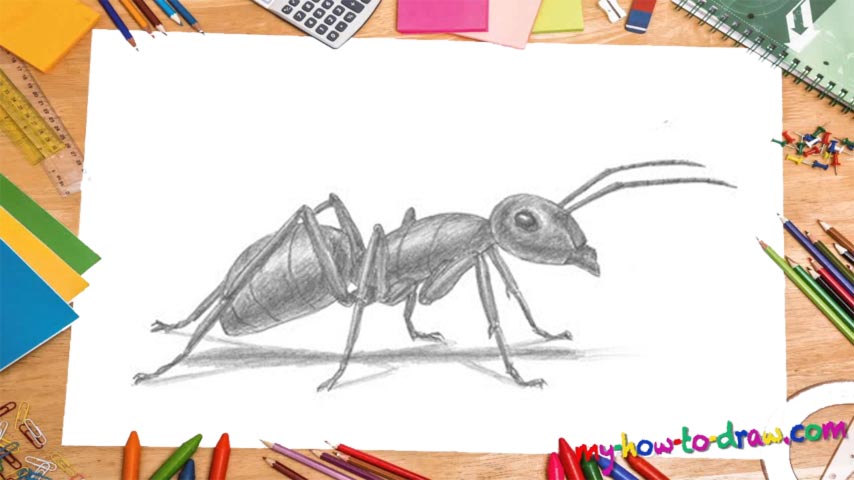
Learn How To Draw An Ant Quickly
Start with a circle in the right corner (00 min 40 sec). We’ll need two more separate shapes next to this one to create a rough drawing of the insect’s body. But before that, add a U-shaped curve to complete the head (00 min 50 sec). The second shape sits in the left corner and looks like a bullet (01 min 10 sec). The third shape is a bigger version of the 2nd one (01 min 30 sec).
Ok, the intro to this how to draw An Ant tutorial is done. Use a series of zigzag-like lines to mark the legs (02 min 01 sec). The rough guide for the eye comes next (02 min 57 sec). The jaw follows. The antennas should be nice and long (03 min 27 sec). If you’re happy with everything, go back to the legs and make them thicker and more defined (04 min 51 sec).
The next part of the how to draw An Ant video guide includes the trademark lines on the body and 3 more legs (06 min 55 sec). Before you get to coloring, don’t forget to get rid of the light strokes (08 min 32 sec). Alright, that’s pretty much it!
Before you learn how to draw An Ant, did you know?
Overall, there are 22 thousand ant species living on planet Earth, and only about half of them are classified. They belong to the same order as bees and wasps, even though they aren’t besties, to put it lightly. The nod-like structure of their bodies, along with the antennas, is their trademark appearance features.
These creatures are known for the superorganism phenomenon. Basically, it’s when thousands or even millions of ants form a colony together and work towards a mutual goal. This is quite an amazing thing to witness, especially given the fact that back in the day we thought that only the humans had the ability to work as a unified entity. Yep, ants are pretty damn smart!