Learn How To Draw A Tooth Quickly
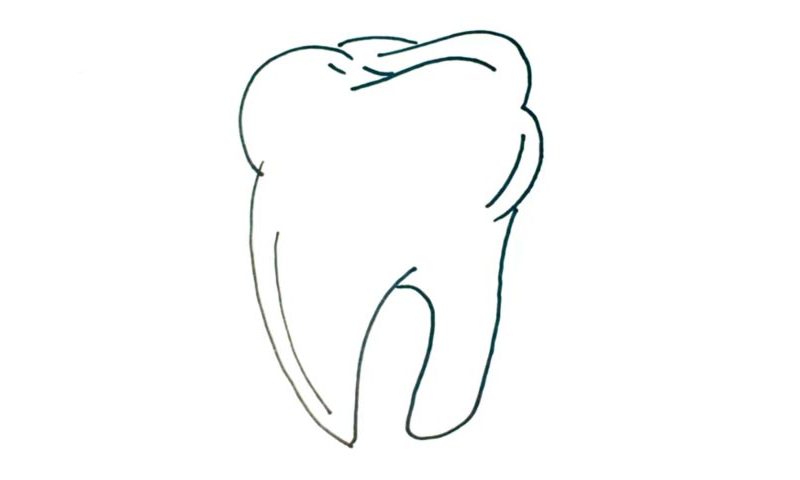
We start on the left side and will take care of the left “wing” first (00 min 07 sec). It looks like a V-sign. Because of the angle, the right side doesn’t look nearly as big and strong. If you’re happy with everything so far, move on to the top corner to take care of the upper half (00 min 25 sec). You’ll need a series of curvy lines that sit on top of each other.
Take your time with this part of the how to draw a Tooth tutorial, as it will make it or break it for you. Overall, there are three curves, and they are all very simple. Once you’re done with all that, follow my example and add a couple of lines here and there to make the drawing look three-dimensional (00 min 40 sec).
Alright, that concludes our how to draw a Tooth tutorial. Looks pretty much like the real thing, right? Using the skills you obtained from this lesson, you can try to create the teeth of other creatures, like how about the saber-tooth tiger? These extinct creatures are internationally known as the owners of the scariest teeth in history.
Before you learn how to draw A Tooth, did you know?
Let’s face it: we wouldn’t be able to chew anything without our precious teeth. This hard structure allows us to break down our food and enjoy our meals. Most vertebrates have teeth; the carnivores, for example, use their teeth for defending themselves and for attacking their enemies and prey. The mammals have teeth with deep, strong roots.
Other creatures come with smaller and less “secured” teeth. By the way, did you know that sharks have the ability to grow a completely new set of teeth every 2-3 weeks to replace the ones that were worn out? That’s a pretty cool ability, right? No need to brush your teeth in the morning anymore!