Learn How To Draw A Toaster Quickly
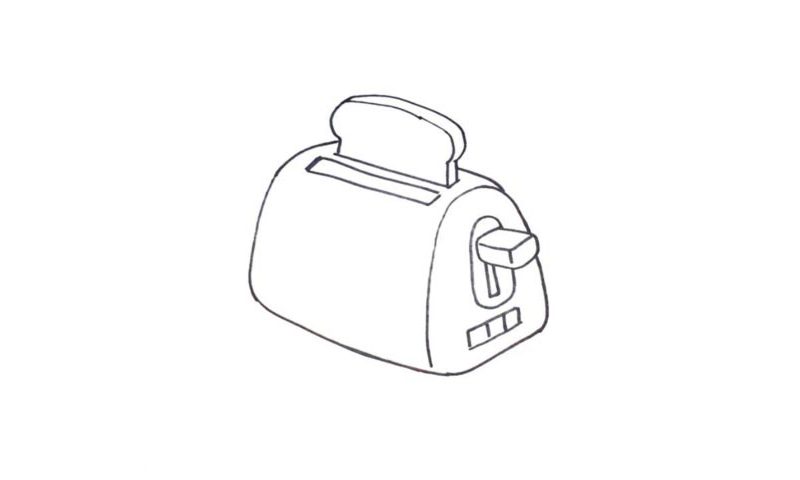
The hardest thing about this tutorial is that the drawing must be in 3D. Otherwise, it won’t look anything like what you see in the video guide. So, if you really want to learn how to draw a Toaster, follow me closely and try to keep up! We begin at the very bottom (00 min 08 sec). The main body looks like a tiny bag that the sports folks really love.
Use two identical curves in the front and in the back to outline the three-dimensional side of the Toaster (00 min 20 sec). If everything’s ok and you’re happy with the result so far, go ahead and start working on the controls and knobs in the right corner (00 min 35 sec). Draw an oval around the main switch (00 min 41 sec).
The rectangle at the bottom with even more controls follows (00 min 54 sec). Ok, we’re down to the last part of this how to draw a Toaster tutorial – the top (01 min 04 sec). Those classic slots that “pop up” the bread are the final thing to take care of. There’s only one bread in this particular machine, but that’s more than enough for an authentic drawing.
Before you learn how to draw A Toaster, did you know?
The Americans really love to “heat up” their bread, and that’s exactly why Toasters are so popular here. By the way, do you know when the very first working prototype was invented? Back in 1893, if you can believe that. And it was Scotland that brought this wonderful thing into our homes.
Over the years, the technology was perfected, and now we’ve got automatic Toasters that do everything for you, including popping the delicious slices of bread up. All you’ll need to do is wait for 1-3 minutes. Oh, and in the sci-fi books and movies, the humans use this word to insult the androids :).
