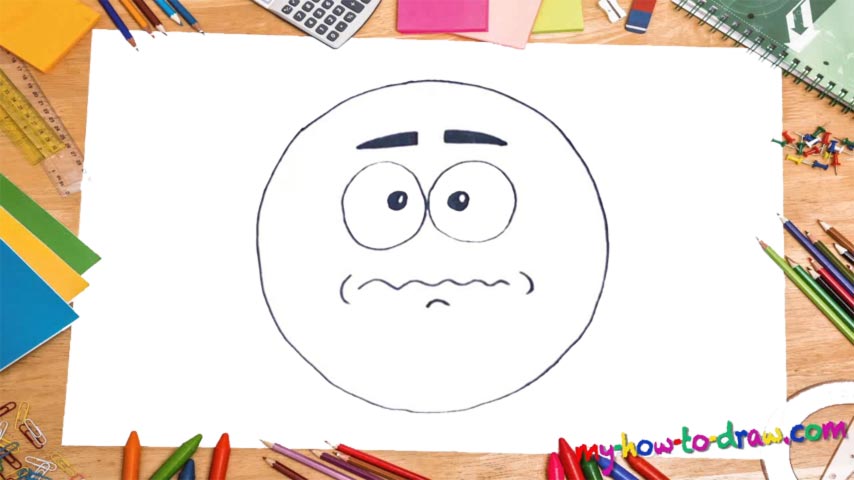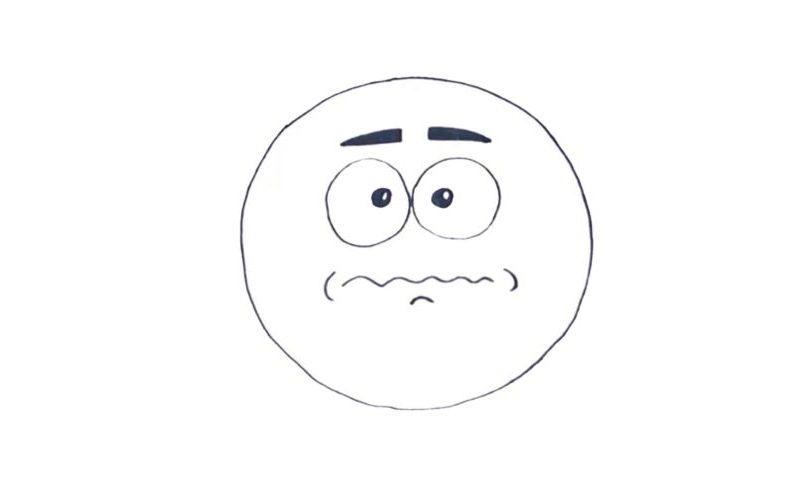
Learn How To Draw A Worried Emoji Quickly
Looking for a way to boost your artistic confidence and have some fun? Then take a look at this wonderful (and contemporary) how to draw a Worried Emoji tutorial! I promise you’ll be able to “crack” it even if this is your first time holding a pencil/marker. As you can see, we’ll be dealing with a lonely head in the middle of the composition – nothing else.
With that said, the circle outlining the fella must be super smooth (00 min 06 sec). This will be a great exercise for you, by the way :). The funny eyes are the next step in this how to draw a Worried Emoji tutorial (00 min 30 sec). You’ll need two overlapping circles for this part. The pupils should be “sitting” really close to each other (and to the edges).
The brows are nice and easy (00 min 56 sec). Color them black and jump to the very bottom of the head to create the mouth (01 min 26 sec). I’d recommend saving this as a template because now that the mouth is not there anymore, you can turn it into a happy drawing. But, for the sake of this video guide, go ahead and draw a sad and wavy line to match my result.
Before you learn how to draw A Worried Emoji, did you know?
With technology becoming an integral part of our lives, the world learns of new concepts and features. Say, a decade ago, nobody really knew what an “Emoji” was. But today, there are tons of these things, and the celebrities even come up with their own funny faces.
In this tutorial, we’re dealing with one of the most popular Emojis on the Internet – the so-called worried face. Instead of trying to explain yourself over the phone and/or sending a long message, just use an Emoji to describe how you feel at the moment. Pretty handy, huh?