Learn How To Draw A Tambourine Quickly
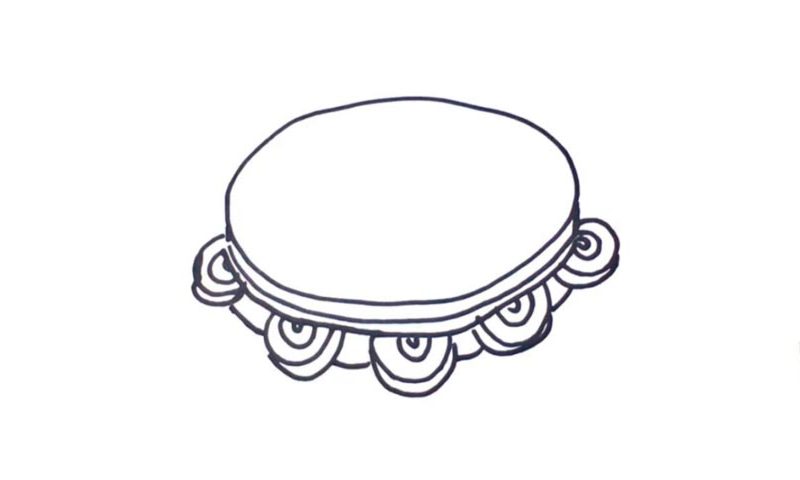
Begin with a circle in the middle of the paper (00 min 07 sec). Once it’s in place, add a half-circle at the bottom to accentuate the fact that the composition is in 3D. The next step of this how to draw a Tambourine tutorial is the first metallic “trinket” hanging in the right corner (00 min 30 sec). You’ll need four oval shapes to get it done – nothing fancy there.
Make sure you follow my guide closely and get the proportions right. Overall, there are five jingles, and they all look the same. Obviously, they’re not a 100% match of each other, but almost identical. As you can see, I’ve added another half-circle right at the bottom (01 min 06 sec). The final step in this how to draw a Tambourine tutorial are the curves between the jingles (01 min 12 sec).
They connect them to each other. Ok, we’ve officially completed this video guide. Do you think it was too easy? Well, how about coloring it? Or using the shading technique to make it look even more realistic? It’s all up to you, dear boys and girls, but we’re done for today!
Before you learn how to draw A Tambourine, did you know?
It might not be the most exciting instrument in the world, but when it comes to giving the rhythm an additional “kick”, the Tambourine does a great job. It belongs to the percussion family and has been in large use in Latin music since the 60s. You can hold it in your hands or mount it on a stand and play it with the drumsticks.
In funk, disco and reggae music, the Tambourine is often used to bring people together and get them more involved in the grove. There are many different shapes of this instrument, but the circular one is, without a doubt, the most popular variation. Folk music around the world also appreciates the capacity of this percussive instrument.
