Learn How To Draw A Smoothie Quickly
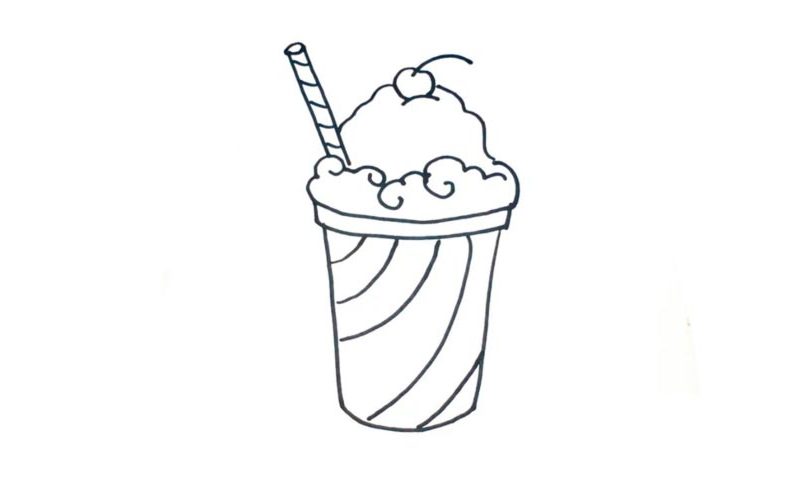
Start in the right corner and gradually move to the left, shaping the cup (00 min 05 sec). As you can see in the preview, it’s a very basic shape without any complex details. The top of the cup is the next step in this how to draw a Smoothie tutorial (00 min 18 sec). You’ll need two equal horizontal curves for this part.
The super-healthy mix, or, as we call it these days, the “smoothie” comes next (00 min 28 sec). Take care of the first “level” before moving on. Use wavy and zigzag-like lines for this stage. The cherry in the upper corner looks awesome, doesn’t it (00 min 46 sec)? Once it’s in place, it will be much easier for you to put the rest of the elements in.
The “cane” is next on the menu in this how to draw a Smoothie tutorial (00 min 53 sec). It sits in the left corner and is the missing detail in our composition. The identical curves on the side of the cup are the final things to handle in this video guide (01 min 07 sec). Overall, we’ve got five of those, and they give it that legendary look from the 50s.
Before you learn how to draw A Smoothie, did you know?
This is one of the most popular products of the 21st century, period. Basically, a Smoothie is just a beverage made from a number of fruits and/or veggies. Some folks add water, ice, and all kinds of different ingredients, while others prefer to keep it “raw” for a maximum effect.
If you’re a big fan of sweeteners and can’t imagine your life without them, go ahead and add a little bit of sugar (or, better yet, honey). Dairy products work great with fruits. So, what’s the difference between a milkshake and a smoothie, you might ask? Well, the latter is all about fruits and vegetables, while a milkshake puts the emphasis on milk/ice cream.
