Learn How To Draw An Astronaut Quickly
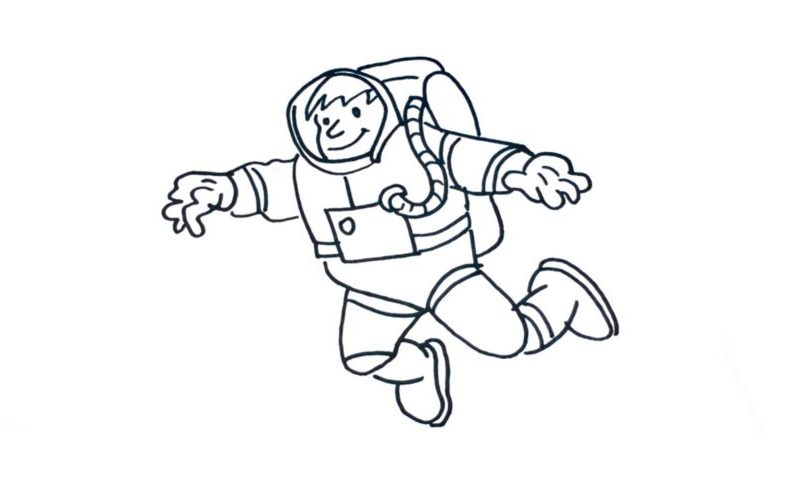
The head comes first, along with the helmet (00 min 05 sec). The facial features are very basic, but they still fit this how to draw an Astronaut tutorial perfectly (00 min 28 sec). You’ll need two simple shapes for the nose and the mouth and two tiny circles for the eyes. Don’t forget about the fella’s fancy haircut (00 min 41 sec).
Ok, now that the head is ready, it’s time to move on to the body (00 min 54 sec). The spacesuit comes with a cylinder in the back that contains the oxygen for the astronaut. It’s connected to the front with a long “tube” (01 min 16 sec). Both hands are nice and simple, without any sophisticated angles (01 min 55 sec).
Same goes for the legs, the next step in this how to draw an Astronaut tutorial (02 min 42 sec). They consist of several parts, which makes this easier. Put the legs in first before you add the boots. Ok, we’re actually done! As you can see, the suit doesn’t come with many details, and the limbs are just hanging in the air.
Before you learn how to draw An Astronaut, did you know?
According to statistics, the majority of young boys around the world want to be either a firefighter, a policeman or an astronaut. Come on, who doesn’t want to put on a cool costume and conquer the Universe? True, these people put their own lives at risk every single day, but it’s all worth it, and you can’t be a pioneer without at least a certain amount of danger.
Today, Russia, China, and the States are the leading nations when it comes to space exploration and the capabilities for colonizing other planets. There’s still so much we don’t know about our own Galaxy. Hopefully, with the space programs becoming more and more advanced, we will learn the answers one day.
