Learn How To Draw A Rat Quickly
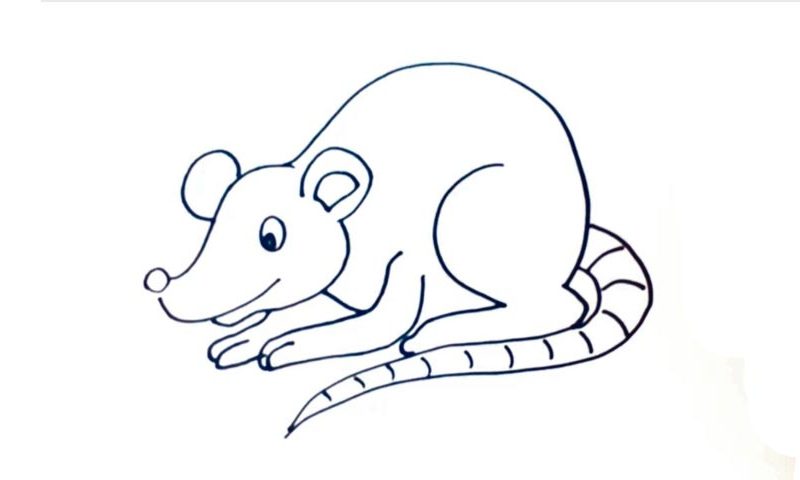
The tiny circle in the left corner is the rodent’s nose (00 min 07 sec). As for the three curvy lines attached to it, they form the head and the jaw. You need to pay attention to this step of the how to draw a Rat tutorial and make sure you get the sizes and the proportions right. If you’re happy with everything, move on to the eye (00 min 22 sec).
The cute ears follow (00 min 27 sec). They look almost the same, but the one on the right is more detailed. See that huge “arc” that covers most of the back (00 min 38 sec)? It’s the next stage of this lesson. Check out the final result so that you get a clear image of the rat’s position in this drawing. The legs are pretty big and sit next to each other.
They are the next step in this how to draw a Rat tutorial (00 min 45 sec). You can only see two fingers, though. The tail is easy and very straightforward (01 min 02 sec). Cover it with vertical lines for additional realism – that’s it!
Before you learn how to draw A Rat, did you know?
Who doesn’t know rats, right? They are bigger and more aggressive than mice. But, overall, they are pretty much the same. If you’ve got a cat living in the house, rest assured that no rodent will ever step foot in there. Well, unless your cat is a lazy one with a big belly and no hunting instincts whatsoever :). There are many different names for these creatures.
However, the regular folks use the word “rat” to describe larger species and “mouse” for the smaller ones. Furthermore, there’s a whole list of tiny mammals that are technically not rats, but we still call them that. By the way, did you know that the infants are called pups/kittens? It sounds kinda funny, right, especially given the fact that cats are their biggest enemies!
