Learn How To Draw A Pug Quickly & Easily
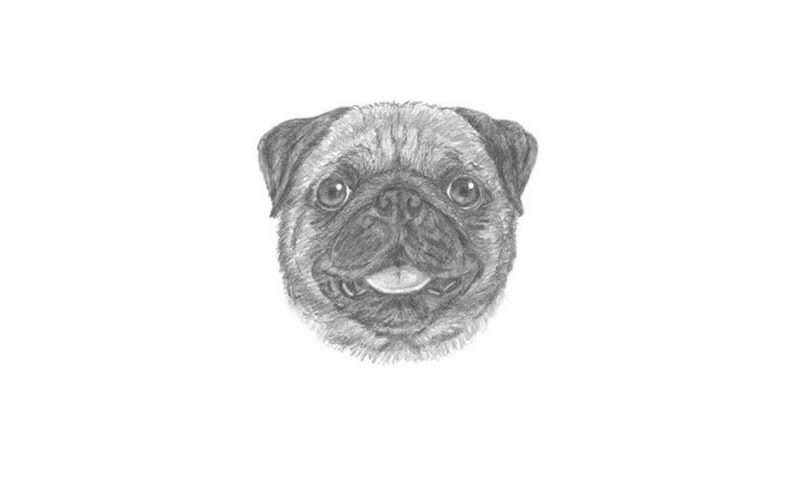
If you like dogs, then this video guide should be right up your alley. Proportions are very important here, so, watch the how to draw A Pug tutorial closely. See that huge circle in the middle of the paper (00 min 07 sec)? It’s there for the head. Divide it into several parts with 2 lines, as I did. Inside the original circle, there’s another one – it’s much smaller (00 min 16 sec).
After you add the guidelines for the ears, we can move on to the real deal. Get to the eyes first (00 min 23 sec). You’ll need 3 circles for each – 1 big, 1 tiny black, and 1 tiny white. The nose sits a bit lower (00 min 37 sec). Put it where the 2 dividing lines come together. Let the lines guide you further in completing the mug (00 min 45 sec). The lower half and the nose should resemble an alarm clock.
To complete the how to draw A Pug tutorial, add a lot of “fluffy” curves (01 min 03 sec); again, watch the video carefully for that. Next, grab an eraser and get rid of the guides (01 min 30 sec). The coloring is the hardest part, but the drawing also looks great without it!
Before you learn how to draw A Pug, did you know?
A pug is a pretty funny dog species with a cute curled tail and a somewhat short-muzzled mug. The coat, in turn, is quite glossy, and there are several variations of it. Even though pugs aren’t that big and can sometimes be mistaken for cats, their muscles and reflexes are quite impressive.
It is believed that this breed was brought to Europe from China sometime around the 16th century. Since then, they’ve managed to not only survive but also prosper. Queen Victoria had a soft spot for pugs. To this day, pugs are strongly associated with the British royal family.
