Learn How To Draw A Policeman Quickly
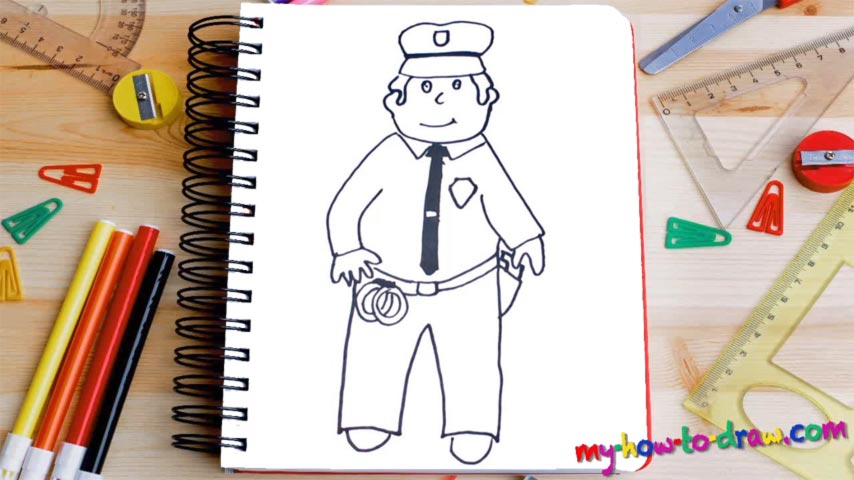
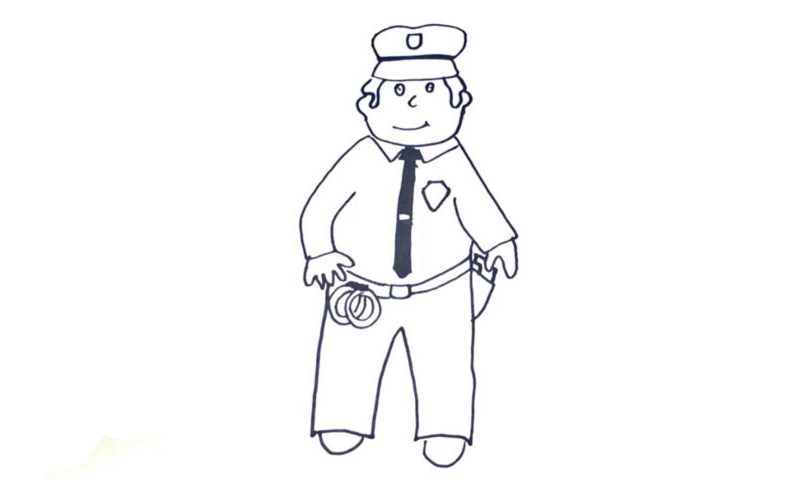
You might think that this is one of those hard tutorials, but it’s actually not. All you’ll need to do is follow my guidelines and learn how to draw a Policeman – that’s it! Start with the head (00 min 07 sec). Once it’s in place, move on to the fancy cap (00 min 24 sec). It’s got two “levels”, and it would be wise to handle the first one before moving on to the next.
Add the trademark emblem in the upper corner and go back to the head to draw the facial features (00 min 42 sec). The eyes, the nose, and the mouth are all super primitive and will be done in a matter of seconds. Ok, now it’s time to get to the next phase – the body (00 min 59 sec). The hands, or, rather, the sleeves, come first. Don’t try to “fix” anything: leave everything the way it is the video.
The suit and the tie are the next steps in this how to draw a Policeman tutorial (01 min 10 sec). Color the tie black and leave a tiny spot in the middle. The symbol on the shirt sits in the right corner (01 min 37 sec). As you can see, the hands and the feet are a piece of cake. The belt separates the body from the legs and holds both the gun (on the right) and the shackles (on the left) (01 min 57 sec). The legs should be nice and large (02 min 35 sec).
Before you learn how to draw A Policeman, did you know?
To protect and to preserve – that’s what we’re used to seeing on the police cars in America. That is their prime goal: to make sure the regular folks live in peace and quiet. Despite the popular belief, cops don’t chase bandits every single day and don’t get shot that often.
In fact, the majority of policemen and policewomen end their careers without even firing a single bullet. You might consider that to be boring, but in their line of view, “boring” is always good. Because all it takes to end a person’s life is one straight shot through the head, the heart, or another vital organ.