Learn How To Draw A Lizard Quickly
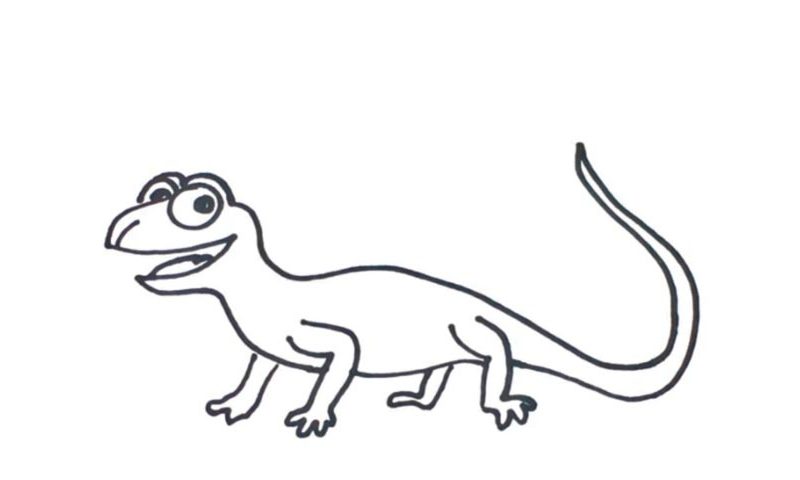
The upper jaw is the first step towards a wonderful drawing (00 min 07 sec). The lower jaw is much smaller. The tongue sits between the two (00 min 14 sec). Do you also think that the eyes are a bit exaggerated? Well, they do fit this how to draw a Lizard tutorial perfectly, so, let’s stick with that for now (00 min 25 sec).
You’ll need two circles for the front eye and two half-circles for the one in the back. If the animal’s head looks exactly like the one in the video, move on to the body (00 min 46 sec). The neck is nice and strong, while the rest of the body is a smidge small compared to the body. Create a super-long line that will cover the back and the tail.
If it’s hard for you to get everything right in one “go”, divide this stage of the how to draw a Lizard tutorial into several parts. The tail should be nice and perky. The legs are the final steps (01 min 03 sec). And, they look very similar to each other, which makes our job relatively easier.
Before you learn how to draw A Lizard, did you know?
You might not believe it at first, but there are more than six thousand (!) species of lizards living side by side with us. They are present on every single continent except for Antarctica because the super-low temperatures are lethal for them. Naturally, with such a huge diversity, we’ve got plenty of peculiar species to pick from.
Say, the chameleons are only 2-3 cm long, while the Komodo dragon can reach three meters in length! Most species are quadrupedal; the rest are legless and move around like snakes. Because of their lazy nature, lizards don’t really like to chase their prey and prefer to sit and wait for the poor victims to come their way.
