Learn How To Draw A Little House Quickly
According to statistics, almost every single kid on planet Earth draws at least a dozen houses during his/her childhood years. Yes, you could say that it’s in our blood, and in this how to draw a Little House tutorial, we’ll improve our skills and deliver a wonderful piece of art at the end. Start with creating the foundation at the very bottom (00 min 07 sec).
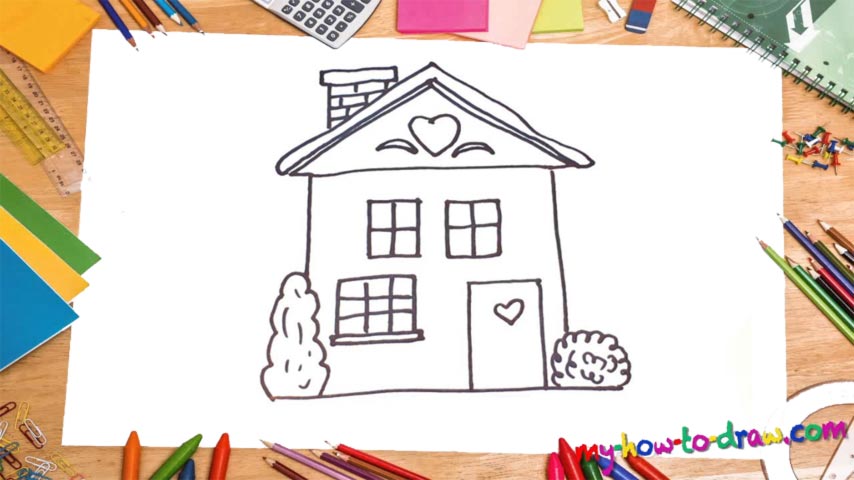
The door – a simple rectangular shape – comes next (00 min 14 sec). Ok, now it’s time to take care of the walls (00 min 27 sec). As you can see, the house comes with two bushes of different sizes on both sides. So, follow the video guide and make sure you get them right. The one on the right is a standard bush, while the one on the left looks like a Christmas tree (00 min 50 sec). The roof is the next step in this how to draw a Little House tutorial.
You’ll need to add a triangle at the very top and “enforce” it with multiple lines (01 min 14 sec). The cute chimney sits in the left corner (01 min 40 sec). The windows are the final step (01 min 55 sec). The ones in the upper corner are identical; the one on the first floor is much bigger. And before you say goodbye, don’t forget about those hearts on the front door and the second floor (02 min 30 sec).
Before you learn how to draw A Little House, did you know?
Even though the TV shows, movies, books, and celebrity blogs try to tell us otherwise, we don’t really need much to be happy. Just a nice, comfortable home, a car in the garage, and some money in the bank. Just take a look at the house in this tutorial: doesn’t it look adorable?
It’s simple and doesn’t come with any fancy features. At the same time, the charm is there, especially when you look at the heart on the second floor and the beautiful windows. The big-city skyscrapers have nothing on this tiny adobe, do they? Come on, those suburban vibes are truly priceless!