Learn How To Draw A Labrador Retriever Quickly & Easily
The head is the only thing to work on in this tutorial, and because of that, we’ll start with a big circle that’s sitting right in the middle of the paper (00 min 08 sec). Once it’s in place, add dividing lines in the upper half of the circle (00 min 14 sec). The next step in this how to draw A Labrador Retriever guide is yet another circle that’s covering the bottom half of it (00 min 18 sec).
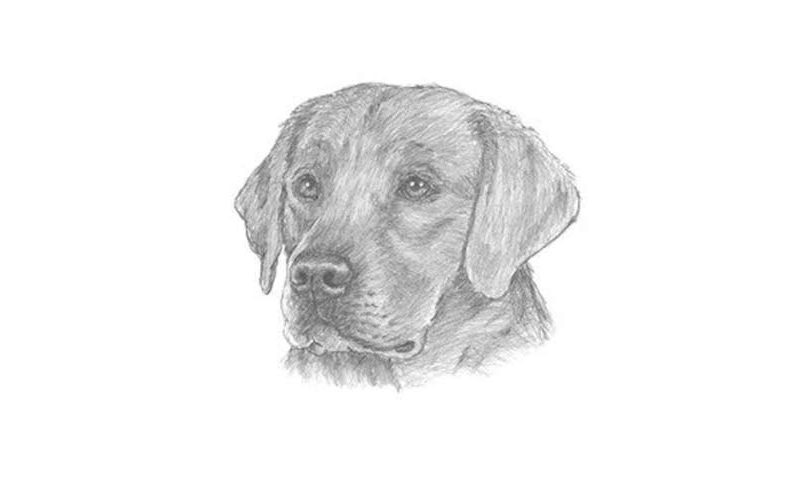
See those triangles on both sides? They are there for the ears. The eyes should be positioned above the horizontal dividing line (00 min 30 sec). Don’t make them too big. The nose reminds that of a piglet (00 min 51 sec). The mouth is the easiest part and makes the doggy look sad (01 min 02 sec).
For the ears to look realistic, you’ll need to switch from the straight lines to wavy ones (01 min 14 sec). Ok, that’s pretty much it for this how to draw A Labrador Retriever tutorial! The final step includes getting rid of the guides (01 min 34 sec). If you’re up for it, follow our example and color the head.
Before you learn how to draw A Labrador Retriever, did you know?
In the US, Canada, and the UK, this breed of dogs is insanely popular – has been for many years. Plus, they are known to be great as disability assistants and help people out on a daily basis. When it comes to police work like investigation and detection, Labrador Retrievers are also quite amazing.
If you’re a hunter and like to take a dog with you, think about these dogs, because, again, you won’t be disappointed by the performance and the loyalty. The modern-day breed was developed in the 1880s and is still considered to be among the most popular ones.
