Learn How To Draw A Drum Quickly
Start in the left corner with a straight vertical line (00 min 07 sec). Do the same on the right side. To cover the bottom of the snare, you’ll need two identical curvy lines (00 min 20 sec). This part of the how to draw a Drum tutorial is very important, as it lays the foundation for the whole thing. Doesn’t look like a drum right now, huh? Don’t worry – it’s about to change!
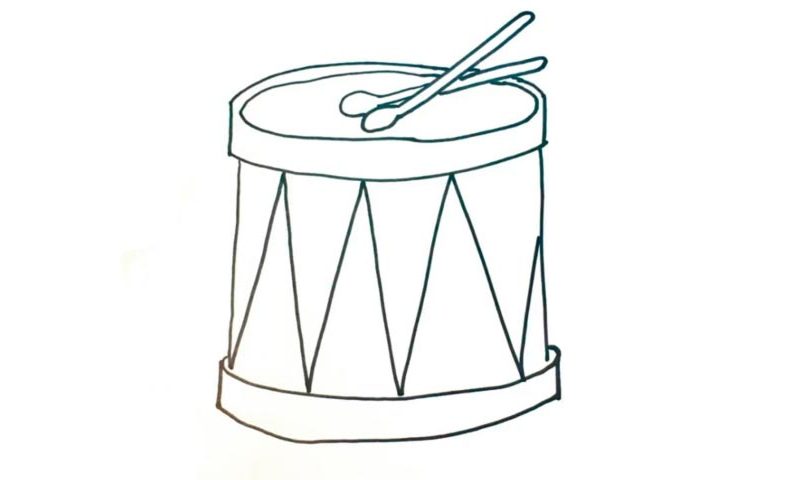
Ok, now that the lower half is done, it’s time to move on to the top. Begin with a similar curvy line (00 min 45 sec). Add two short lines on each side (00 min 52 sec). The next stage is a bit more complicated. Basically, you’ll need to draw two long, smooth lines to cover the upper half and make it look three-dimensional. However, leave some space on the right side for the pair of sticks.
They sit in the middle and look like cotton swabs and/or matches (01 min 20 sec). This is the easiest part of the how to draw a Drum tutorial. Finally, move to the front of the instrument and add the fancy flame-like texture (01 min 52 sec).
Before you learn how to draw A Drum, did you know?
As you can see from the picture, this is a marching drum, the one international militaries use during big-time ceremonies and celebrations. We only have a snare drum, but there’s more than enough to do with this simple setup if you know exactly what you’re doing. Say, in a rock band, you’ll also need a kick, several toms, cymbals, and more.
But in this example, we’re dealing with an affordable and easy-to-master pair of a single drum and two sticks to play it. These kinds of drums have been a big part of the “war routine” for thousands of years, gaining popularity during the reign of the Roman Empire.
