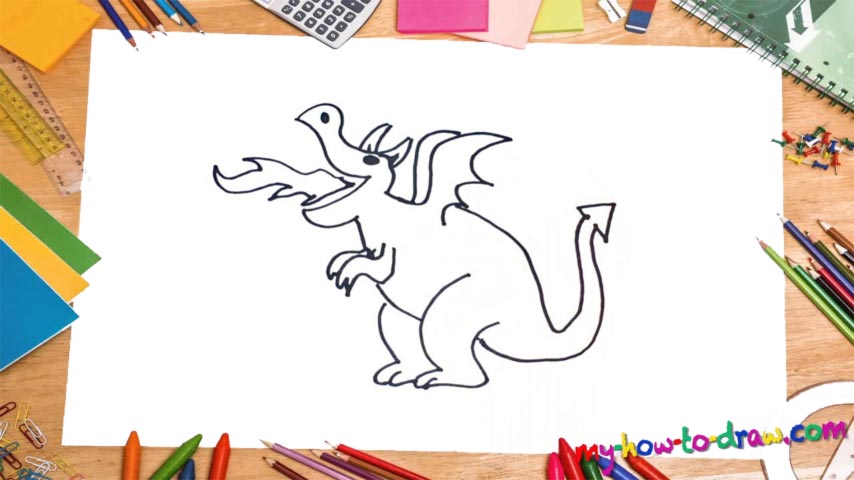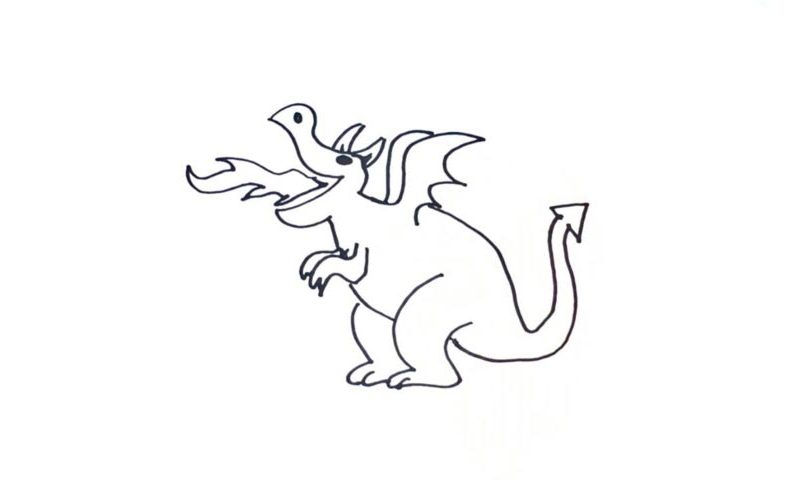
Learn How To Draw A Dragon Quickly
This is one of the best drawings of a majestic beast, especially when it comes to us, folks with little to no artistic skills. So, let’s make the most of it and see if we can “handle” it from the first try. We begin with the head, or, rather, the upper jaw (00 min 07 sec). It looks a lot like a beak. The next step in this how to draw a Dragon tutorial is the lower jaw.
Don’t forget about the only nostril, though (00 min 19 sec). The horns and the tiny eye follow (00 min 24 sec). The horns are identical, while the eye is just a black oval with a white pupil in the middle. Now it’s time for that all-burning flame coming out of its mouth (00 min 48 sec). You don’t have to copy every single curve there, but make sure it looks good.
The wings that look like a pair of stones are the next step in this how to draw a Dragon tutorial (01 min 02 sec). They should be just as high as the jaw. For the tail, you’ll need a super-long curve with an “arrow” at the end (01 min 12 sec). The legs sit next to each other and look the same, except that the one on the left is covered a bit (01 min 20 sec). The tiny hands right below the head are the final detail (01 min 40 sec).
Before you learn how to draw A Dragon, did you know?
Did these creatures truly exist? The answer is no. But do they still look cool and thrill the fans of fantasy? The answer is yes. The 21st century made them really popular, thanks to the rise of best-selling books, TV shows, movies, and, of course, video-games.
Part serpent, park four-legged animal, a dragon is a truly majestic beast that can both walk and fly. With a breath that can burn metal and a tail that can cut through even the mightiest stronghold, these beings are considered to be divine in many cultures around the world.