Learn How To Draw A Clover Quickly
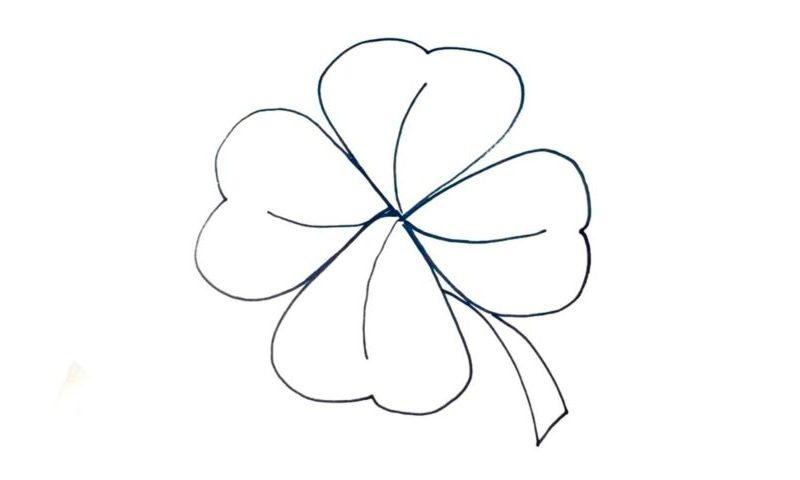
This is, without a doubt, a very beautiful flower. As for the video guide, it’s super-easy and “chill”. We’ve got four leaflets that look like tiny hearts. Start this how to draw a Clover tutorial with the one in the upper corner (00 min 08 sec). Complement the basic shape with a curvy line to make it more realistic (00 min 15 sec).
Do the same with the leaflet on the right (00 min 25 sec). Basically, all four are the same, with tiny differences here and there. That means once you master the first half, the rest will be a walk in the park. Those curves that are present in every single petal form a shape that looks like a cross in the very middle of the composition (00 min 45 sec).
The final part of this how to draw a Clover tutorial is the stem in the lower right corner (00 min 53 sec). Use two simple curves to complete it. Ok, now you know the art of drawing a beautiful flower. And it took you only a minute!
Before you learn how to draw A Clover, did you know?
We use this term to describe a whole bunch of plants (300 species in total, to be exact). Usually, they are evergreen, but not always. As for the colors, they can be white, yellow, purple, and red. A field full of clovers looks truly enchanting, and the smell is also quite amazing. By the way, this flower is great as a fodder plant (food for the animals).
The Irish folks treat clover with the utmost respect, as it has a special place in their history. Around the world, this flower is associated with a comfortable life full of joys and prosperity. In most cases, clovers come with 3 leaflets – that’s the standard amount. So, if you find one that comes with 4 or more, make sure to keep it around for luck.

Hiiii