Learn How To Draw A Christmas Tree Quickly
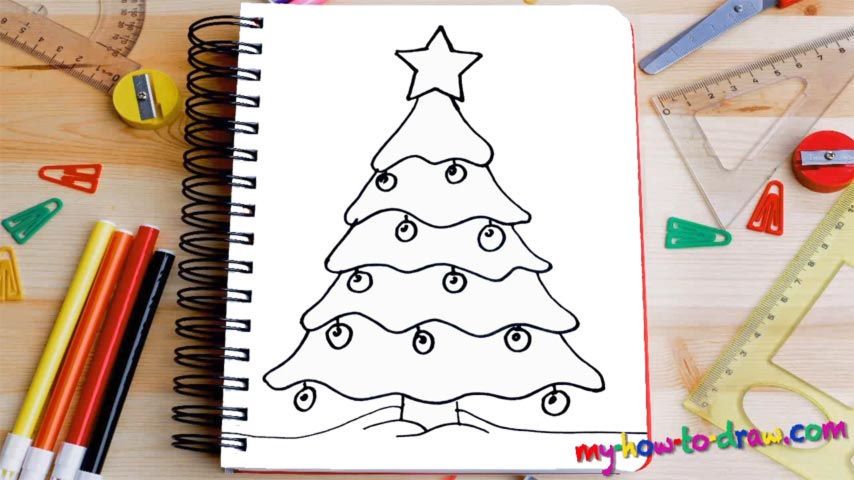
To make things easier, I suggest we start with the very foundation (00 min 06 sec). So, the stem comes first in this how to draw a Christmas Tree tutorial. And before you move on to the tree itself, don’t forget to add a couple of simple horizontal lines for the ground and the snow around for the holiday mood. The tree is pretty wide and is very “wavy” at the bottom (00 min 20 sec). The entire thing consists of several waves that sit on top of each other.
That means once you master the first one, all the rest will be a piece of cake. Watch the video closely and bring this home. Keep in mind, however, that the higher up you go, the thinner the waves become. Overall, you’ve got five levels and a star at the very top (01 min 11 sec). It’s a classic toy – nothing hard about it. We already have a pretty awesome drawing on our hands. But this how to draw a Christmas Tree tutorial isn’t over yet!
The last things to take care of are, of course, the ornaments (01 min 35 sec). Don’t put any ornaments/toys on the fifth wave. The rest get two each, including the very bottom. The second level gets three (02 min 10 sec). This is the easiest part of our tutorial and you’ll have tons of fun with it. And put the final result into a nice frame to surprise your friends!
Before you learn how to draw A Christmas Tree, did you know?
It doesn’t really matter how big, tall, or green your tree is. The ornaments do play a big role, but even they aren’t that important. The Christmas mood is what counts, and the tree is only there to make it better. This is an old tradition that originated in Europe.
The historians claim that Germany is the country where it all started. These days, the majority of the world’s nations celebrates Christmas and can’t imagine it without a proper fir tree right in the middle of the house. Go ahead and decorate it while you still have time!