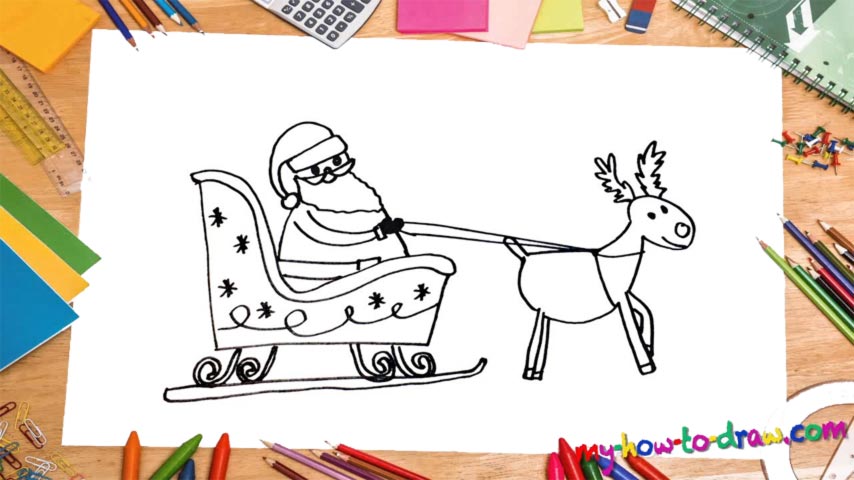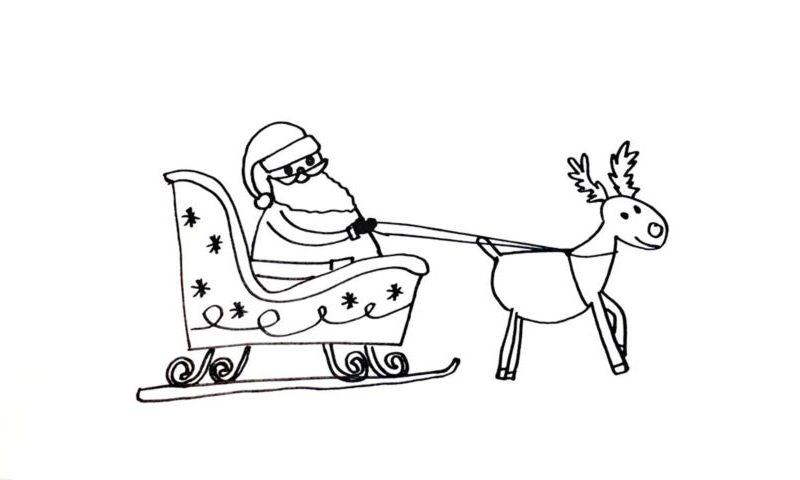
Learn How To Draw Santa Claus Sleigh Quickly
We’ll start from the right and make our way to the left. That means the mighty reindeer comes first in this how to draw Santa Claus Sleigh tutorial (00 min 07 sec). Create an oval shape for the head and leave some space for the neck. Next, add two eyes, a nose, and a mouth. They are as simple as they come and you’ll be done with it all in a matter of seconds.
It doesn’t look much, but after you add those “horns”, the animal will turn into a beauty (00 min 28 sec). We’ve got two of those and they look very much alike. Ok, we’re done with the hard part. Now just follow the video-guide and complete the primitive body (00 min 45 sec). The legs are very skinny; the body doesn’t have any additional details.
The comfortable sleigh is the next step in this tutorial (01 min 28 sec). It’s pretty big and looks like a chair. If you really want to master this how to draw Santa Claus Sleigh tutorial, you’ll have to put the old man into that seat (03 min 03 sec). Make sure you keep the proportions right and his beard looks cool enough. The facial features are nice and simple. Same goes for the hands.
Before you learn how to draw Santa Claus Sleigh, did you know?
He’s quite a busy man and only comes around once a year. The thing is – every single kid out there needs Santa, which makes him one of the most “wanted” folks on the planet. Mr. Claus makes great use of his sleigh and always arrives on time, even during the “busy hours”.
In this tutorial, we’re dealing with a classic image of the old man on a sleigh with a reindeer pulling it through the snow. This is one of those iconic portraits of Santa that we see in many logos and the good old children’s books. So, make a wish and enjoy your Christmas!