Learn How To Draw A Christmas Elf Quickly
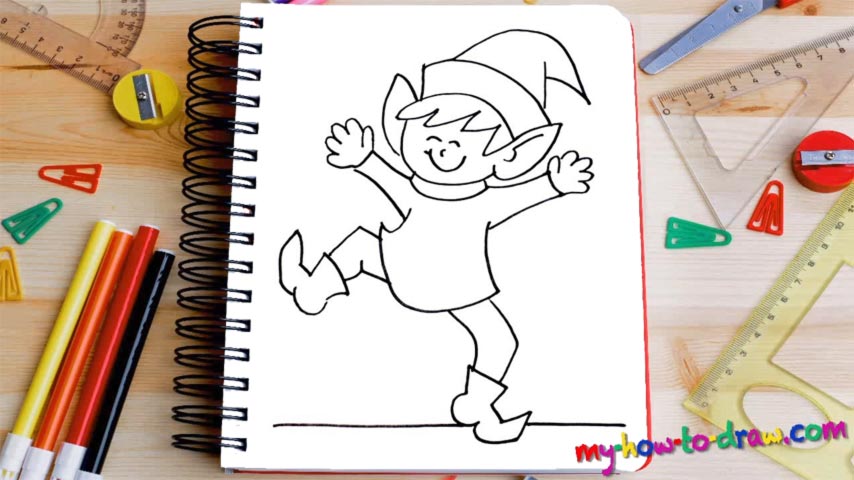
Let’s get right to it and start with the boy’s head (00 min 06 sec). Use a curvy line to cover the bottom. Draw another line for the huge ear (00 min 10 sec). The next step in this how to draw a Christmas Elf tutorial is the hairline that connects it all together (00 min 19 sec). The hair itself should be zigzag-like to make the character look more realistic.
If everything’s looking good, go ahead and put the facial features in (00 min 27 sec). You’ll need four simple curves for this stage: two for the eyes, and two for the nose and the mouth. After you add the other ear, the head will be complete (00 min 35 sec). That fancy hat is the only thing left to create before moving to the lower part of the drawing (00 min 41 sec). It’s a classic Elf hat, by the way.
Ok, now we take care of the next step in this how to draw a Christmas Elf tutorial – the body (00 min 55 sec). I recommend putting the sleeves in and outlining the shirt before getting to details. Once that’s done, go ahead and draw the fingers on the right hand (01 min 15 sec). Do the same with the left one. The most important thing with the legs is the size (and their respective positions). They look the same and have fancy boots on.
Before you learn how to draw A Christmas Elf, did you know?
This guy is, obviously, a big fan of Christmas. Plus, he’s one of Santa’s most trusted helpers. Without his army of “minions”, the old man simply wouldn’t be able to “pull off” the holiday season. Fast, agile, and full of life, an Elf is always there to lend a helping hand.
Furthermore, Mr. Claus trusts these fellas with the gifts: they are quite capable of coming up with crazy ideas and bringing them to life. The North Pole is a harsh place, but not when you’ve got a purpose and make the kids enjoy this wonderful holiday.