Learn How To Draw A Christmas Candle Quickly
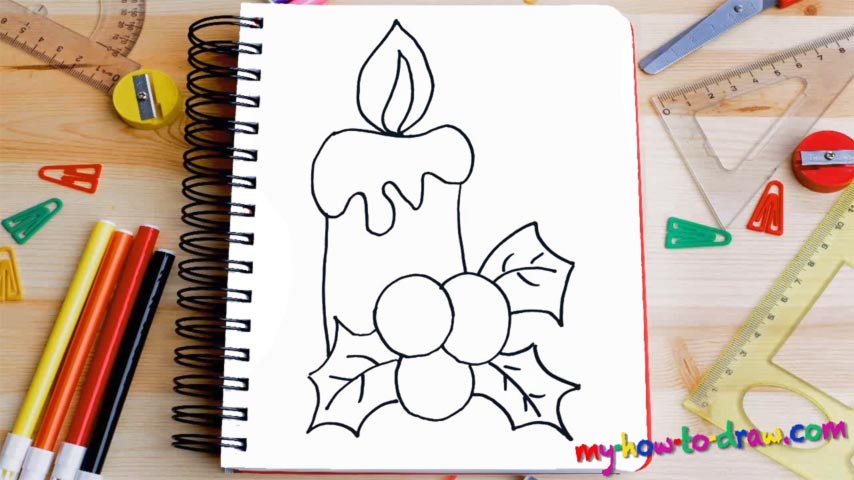
Did you think we’d start with the “main event” – the candle? Well, no, it would be wiser to begin this how to draw a Christmas Candle tutorial with the mistletoe at the very bottom (00 min 06 sec). For this, you’ll need three equally-sized circles that sit on top of each other and look like an ice-cream that you see in the movies. Once those are done, move on to the leaves right next to them (00 min 19 sec).
Again, you’ve got three in total: two on both sides, and one in the top right corner. Take care of the leaf on the left first. They all look pretty much the same, even though there are some tiny differences between them (in shape and size). By the way, if you ever wanted to master the art of drawing mistletoe, you just did! But we’re here to learn how to draw a Christmas Candle, and that’s going to be the next step in this video guide.
It’s actually much easier. We’ll need two straight vertical lines to shape the main body (00 min 50 sec). The tallow/wax covers the top. The last thing to add is, of course, the fire (01 min 08 sec). This might not be the most realistic drawing in the world, but it sure does have a certain touch to it.
Before you learn how to draw A Christmas Candle, did you know?
If you’re in the right mood, a candle will turn your Christmas into a wonderful time. Turn the lights off, get your loved ones together, and enjoy a quiet get-together in a nice, campfire-like atmosphere. You can use regular candles for this – they’ll still get the job done, obviously.
But it would be an even better idea to get some special Christmas candles that fit the intimate mood perfectly. They come with mistletoe and/or some ornaments, nothing special. That means the DIY enthusiasts can go ahead and try to make these candles themselves.