Learn How To Draw A Cow Quickly & Easily
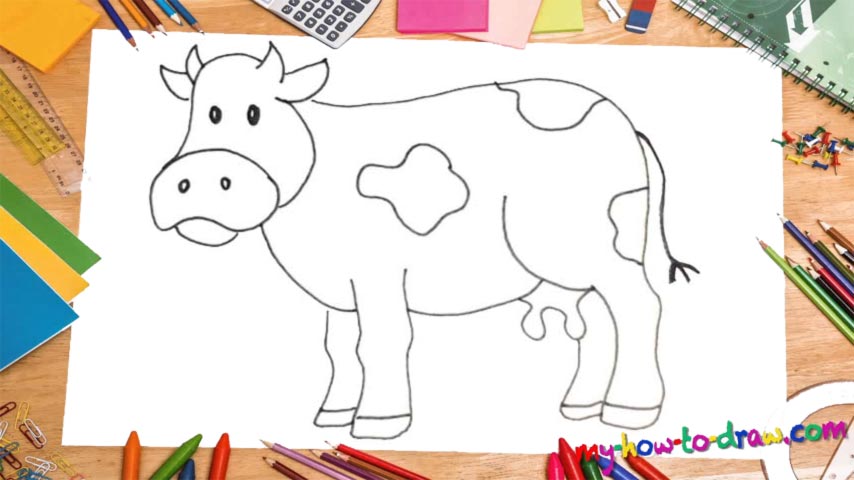
The mug with the nostrils comes first (00 min 07 sec). The mouth is just one simple curve right below it (00 min 22 sec). Moving on with this how to draw a Cow tutorial, use two lines for the animal’s head. The ear and the horn on the right are a bit smaller than the ones on the left that cover the “gap” between the lines we just created (00 min 37 sec).
The eyes are very basic and you’ll need two tiny ovals to finish them (00 min 50 sec). Ok, it’s time to get to the body, ladies, and gentlemen. Can you see the line I drew from the bottom of the mug (01 min 01 sec)? Put it in right now. The next, much bigger curve, should start at the left ear and cover the cow’s back and the back leg. Once it’s all in place, create a C-like curve for that leg’s big muscle (01 min 14 sec).
Alright, we’re almost done with this how to draw a Cow tutorial. All that’s left to do is add the rest of the legs. After the couple in the front is done, draw the udder right below that curve we put in a second ago (01 min 44 sec). The fourth leg follows. To complete this tutorial, take care of the “color spots” all over its body and the cute tail (02 min 00 sec).
Before you learn how to draw A Cow, did you know?
AKA Cattle, these creatures are invaluable in our agriculture. We use them as livestock, as dairy animals (they’ve got the tastiest milk in the world), and, of course, to pull all kinds of heavy stuff. The bulls pull the plows and help their owners survive the cold winter.
According to the historians, the cows have been domesticated for more than ten thousand years, and it all began in Turkey. Overall, there are almost one and a half billion (!) cattle on planet Earth. The kids really love cows and learn about them at a very young age.