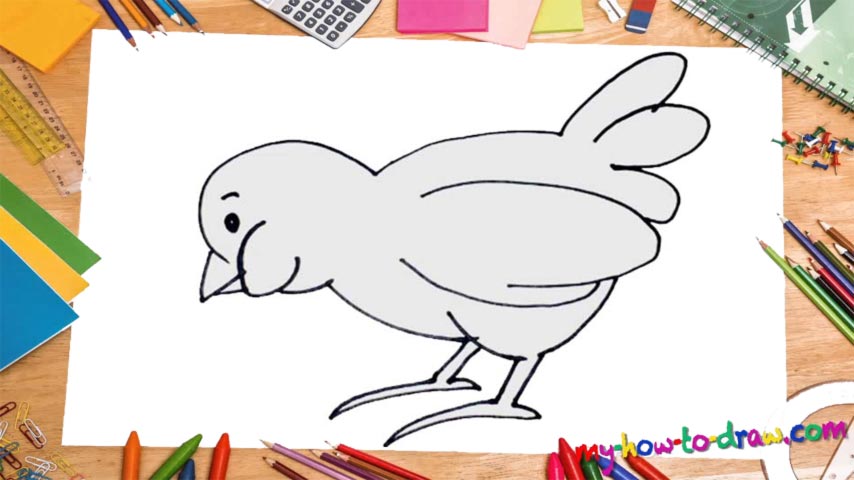
Learn How To Draw A Chick Quickly & Easily
First things first, create a curve that looks like a reversed “C” for the top of our bird’s head (00 min 08 sec). The beak sits right below it and resembles the tip of an arrow (00 min 15 sec). That cute cheek follows. After you add the tiny eye and the brow, you’ll be done with the intro to this how to draw a Chick tutorial (00 min 28 sec). Don’t make it all black – leave some white in the middle to make it more realistic.
Ok, now we move on to the body (00 min 35 sec). The tail consists of three identical parts that sit on top of each other. The wing is located below them and covers the middle of the body (00 min 46 sec). Take your time with this part, because it plays a vital role in the overall composition. You do want your final result to be perfect, right?
You’ll need two curvy lines to complete the body (00 min 52 sec). The last stage of this how to draw a Chick tutorial, the feet, comes next. They look absolutely the same and are the lowest point of this drawing. The most important thing here is not to make them bigger than they should be. Watch the video closely and bring this home (01 min 00 sec).
Before you learn how to draw A Chick, did you know?
The youngsters of the bird family are called chicks – that’s a common term for describing the fledglings. They have a strong presence in our culture, especially when it comes to tales for the little ones. Take Tweety Bird, for example: he’s a chicken and lives on an American farm.
This guy is one of the most popular cartoon characters to ever live and is still loved and cherished by the new generations. As for the birds, they’ve been around for +/- 120 million years, long before we ever stepped foot on the planet. So, treat them with respect!