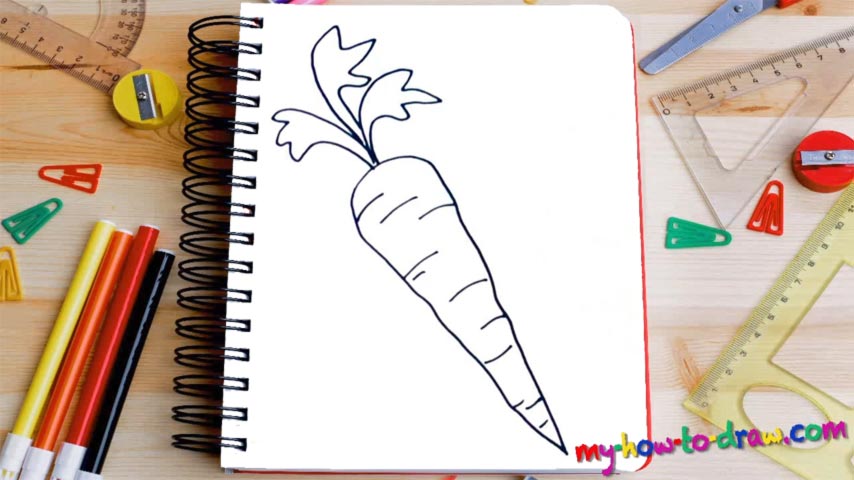
Learn How To Draw A Carrot Quickly
Nothing hard about this one. Simply follow my instructions and let our video guide prove that even without any skill whatsoever, we can create some wonderful drawings. Start this how to draw a Carrot tutorial with a half-circle that will cover the upper half of the taproot (00 min 06 sec). Once it’s in place, use two long lines to cover both sides of the “shaft”.
Keep in mind that the lines shouldn’t be super-straight. Those tiny dips and cuts will make it look more realistic. The taproot becomes sharper and thinner the lower you go. The greens are the next step in this lesson (00 min 21 sec). You’ve got three leaves coming out of the top of the vegetable. They look almost exactly the same, but the one in the middle is taller.
Ok, now we’re off to the final part of this how to draw a Carrot tutorial. Those classic lines on both sides of the taproot will make it resemble the real thing even more (00 min 38 sec). There are no strict rules here. Still, keep an eye on the video to make sure you’ve got everything right with these lines.
Before you learn how to draw A Carrot, did you know?
It doesn’t really matter where you live: carrots will always be a huge part of your daily meals. Women add them to salads, soups, smoothies, and even make “standalone” dishes based on this vegetable. It’s cheap, accessible, and adds a great flavor, turning a regular meal into something truly tasty. Orange is the main color; yellow, red, white and black also exist.
According to the scientists, carrots originated on the territory of the modern-day Persia. Later, they found their way into the hearts and minds of folks in Asia and Europe. These days, carrots are cultivated all over the world. By the way, did you know that in some countries, the greens are also eaten? That’s true, and they actually have a peculiar taste that you might like!