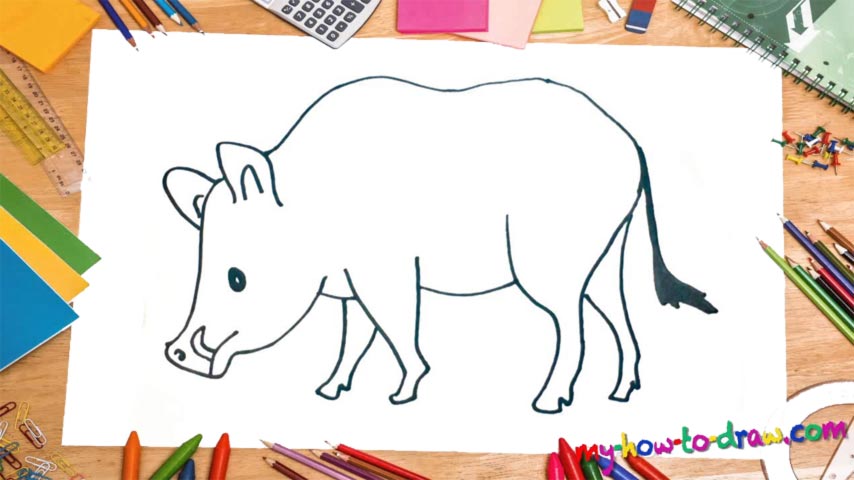
Learn How To Draw A Boar Quickly
Let us begin in the left corner with the animal’s mug (00 min 12 sec). The one and the only visible fang sits at the bottom of it (00 min 21 sec). For the nostril, you’ll need one tiny circle. Same goes for the eye (00 min 29 sec). It should be located approximately in the middle of the head. Ok, we’re done with the intro to our how to draw A Boar tutorial.
Don’t forget about the ears on top of the head before you move on to the body (00 min 36 sec). They both consist of two similar shapes on top of each other. The legs are pretty short, yet strong, and they can be quite fast, too. Begin with the one on the left, closer to the head (00 min 48 sec). See how it’s larger at the foundation and gets thinner at the toes?
Make sure to depict that in your drawing. The legs are actually the easiest part of this how to draw A Boar tutorial. Follow my lead and add the remaining three (00 min 57 sec). For the back, use a long and curvy horizontal line. The tail completes this guide (01 min 23 sec).
Before you learn how to draw A Boar, did you know?
Aka the wild pigs, these guys aren’t to be messed with. Out there, in the wild, they are used to fighting for their lives and confronting even the mightiest predators in the world. Thanks to us, the humans, the boars are today one of the widest-ranging animals on the planet. It is believed that these creatures originated in Asia (the Southeastern part) and gradually moved to Europe.
Overall, there are 16 subspecies of boars living around the globe and are doing pretty great for themselves. The grey wolves are the biggest nightmare of the boars, simply because they are faster, stronger, and have sharp teeth. The boars are believed to be the ancestors of the modern-day domestic pigs. But, they are considerably bigger and look quite different.