Learn How To Draw A Baby Face Quickly
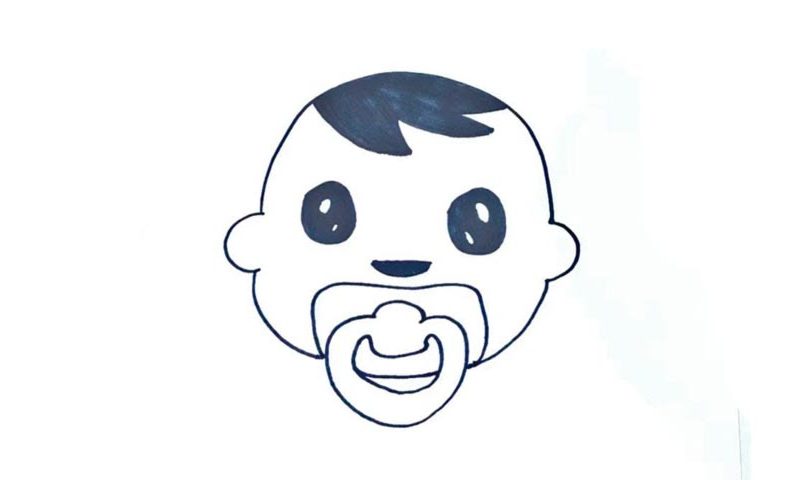
The shape of the toddler’s head isn’t at all complicated, but you gotta make sure the ears on the left and right sit exactly where they’re supposed to (00 min 05 sec). Obviously, the two sides are identical, making the head look like a pot (same goes for most cartoony characters, actually). The next step in this how to draw A Baby Face tutorial is the hair (00 min 15 sec).
It resembles an autumn leaf and should be colored black without any white spots. The huge eyes are located right below it (01 min 21 sec). You should color them black as well, but, in contrast to the hair, leave two white dots to make them look realistic. The nose is just a tiny black shape cutting the head in half (02 min 14 sec).
The final part of the how to draw A Baby Face tutorial is, of course, the pacifier in its mouth (02 min 22 sec). It looks a lot like a door handle, or, rather, the part that we use to knock on it. We can’t see the mouth because the pacifier is blocking it.
Before you learn how to draw A Baby Face, did you know?
Babies are quite amazing. They don’t really act like the grown-ups and seem to be living in a different world. Taking care of the little ones is a huge responsibility, because we, the humans, are one of the most vulnerable beings on planet Earth as babies. We’ve got a classic image of a baby in this video lesson, with big, round eyes and everything.
A quick tip: if you ever find yourself alone in a room with a baby on your hands, make sure to give him/her a pacifier. With it, the half of your troubles will go away. As you can see, the kiddo in this tutorial comes with a pacifier, and it, well, pacifies the little one. As far as the cutest lessons on our website go, this one’s definitely among the most adorable ones.
