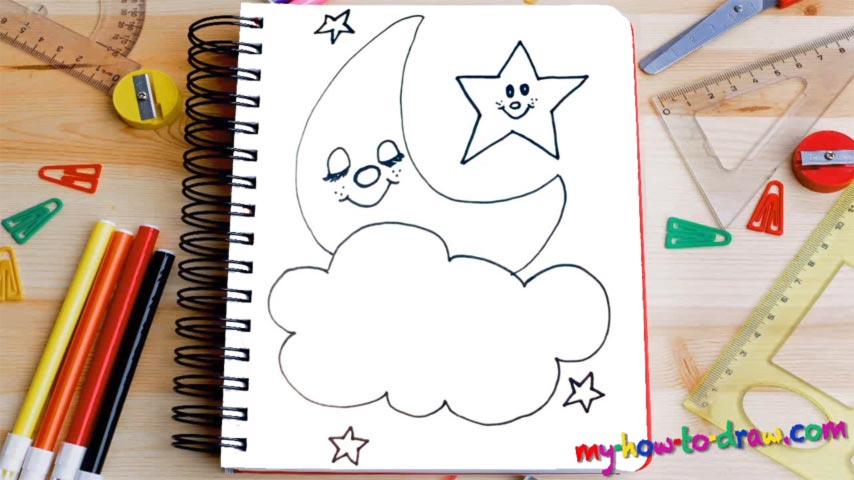
Learn How To Draw The Moon Quickly
Start in the upper left corner with the top of our half-moon (00 min 07 sec). The curves must be super-smooth and round. As you can see, I left some space in the bottom for the cloud to fit in (00 min 16 sec). It’s approximately as tall as the moon that it’s holding and covers the lower half of the paper.
For this part of the how to draw The Moon tutorial, use wavy lines and half-circles. It’s a very basic shape, one that you’ll master in a couple of seconds. Don’t try to make it match my example fully, but do keep the size and the proportions right. The facial features come next (00 min 38 sec). The nose looks like a potato. The mouth is just a simple curve.
The eyes come with beautiful lashes and there are freckles above the mouth (00 min 55 sec). This is the most fun part of the how to draw The Moon tutorial. The star right above it also has eyes, a nose, and a mouth (01 min 40 sec). The remaining three are “faceless”.
Before you learn how to draw The Moon, did you know?
As our one and only satellite, Moon plays a vital role in Earth’s natural cycles. Without it, the oceans would go crazy and we’d have a completely different environment to live in. For the Universe, the distance between these two cosmic bodies is super short. But at this stage of our technological progress, flights to the moon are still very dangerous and take time.
The writers, the poets, and the artists have been fascinated by this yellow satellite ever since the dawn of our kind. Some superstitious folks claim that you shouldn’t look at it when it’s dark outside and the moon is full. Otherwise, you’ll turn into a werewolf. Obviously, it’s just a stupid myth, but it’s not the only one! The Soviets were the first nation in history to reach the Moon with an unmanned spacecraft (they did it in 1959).