Learn How to draw Tardis From Doctor Who Quickly & Easily!
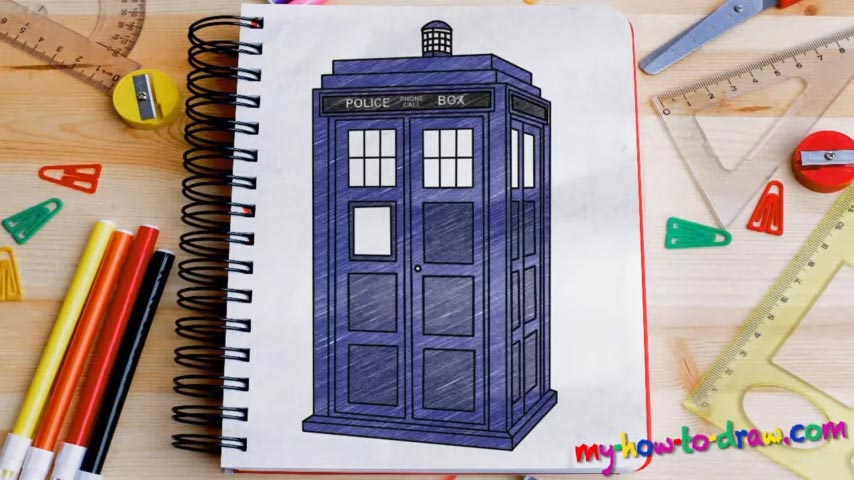
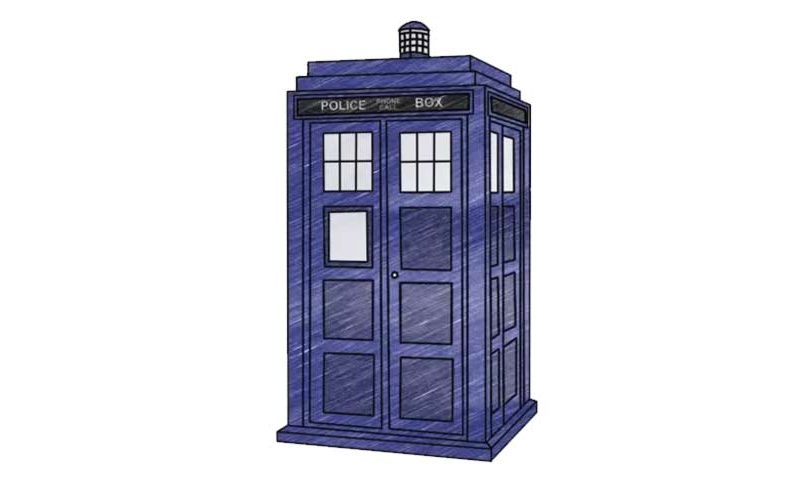
You could think that this is a pretty easy composition judging by the repetitive nature of it, but the truth is – it’s not that easy to make an object look 3D. And that is why we’ll start learning how to draw Tardis From Doctor Who with a simple rectangular shape in the middle of the paper (00 min 26 sec). Next, use three lines on the right side to turn it into a three-dimensional object.
That’s the foundation for our magical box. You should think of it as a tall dresser of some sorts. With that image in your head, it will be a lot easier to get everything right. Add a couple of “shelves” on top and on at the bottom (00 min 45 sec). Once that’s done, add two narrow rectangles of equal size (01 min 38 sec). That cool police siren comes next (02 min 02 sec).
Ok, now it’s time to move on to the main part of this how to draw Tardis from Doctor Who tutorial – the “windows” in the front (02 min 25 sec). You’ll need eight of those. The ones at the very top look exactly like windows (02 min 58 sec). The second one in the left should be colored in white just like the ones above it. The rest are there for fun (03 min 35 sec).
Do the same thing with the side wall (04 min 12 sec). Again, create eight windows, but paint white only the two ones at the top. Finally, write “Police Phone Call Box” on the front panel (05 min 20 sec). That’s it for today’s tutorial!
Before you learn how to draw Tardis From Doctor Who, did you know?
You could think that this is just some sort of a telephone booth, but it’s actually far more sophisticated than that. Tardis is a time machine and a super-cool spaceship from the legendary TV series. The doc uses it to travel around the globe.