Learn How to draw Mater From Cars Quickly & Easily!
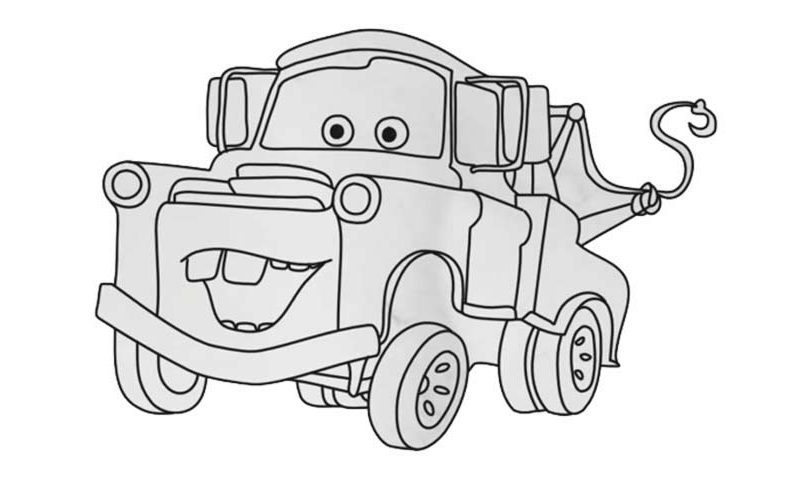
First of all, we’ll need the headlights (00 min 28 sec). The mouth is this character’s trademark, which means you’ll have to be extra careful with this part of the how to draw Mater from Cars tutorial (01 min 12 sec). Overall, he’s got seven teeth; the ones in the top left corner are, of course, pretty huge. The rest of ’em are tiny.
That curvy shape right below it accentuates the funny expression (01 min 47 sec). The next part is a bit tricky. You’ll have to make sure the side of the car looks 3D and keep the proportions right (02 min 07 sec). Follow the video closely. Keep in mind that there are four tires in the back and two up front. Furthermore, the front left tire is located well below its “home” (03 min 31 sec).
These details give our character some unique features – don’t treat them lightly. Once all the tires are in place, move back to the body of the car and finish it (04 min 34 sec). The final stage of this how to draw Mater from Cars tutorial deals with the top of the vehicle. It’s actually a lot easier than the bottom (04 min 55 sec). Don’t forget about those cute eyes – they’re very important!
Before you learn how to draw Mater From Cars, did you know?
As far as the best-animated series of our time go, Cars is, without a doubt, right there among the leaders of the race. And while McQueen is the main character, this guy is a celebrity in his own right. He’s Lightning’s best friend and his #1 fan (and critic).
Back in the day, Mater’s color was bright blue. But these days, he’s kinda rusty. Plus, the roof is nowhere to be found, as is the left headlight. Despite the somewhat beaten up look, he’s got some skills out there on the road and taught McQueen a trick that saved his life.
Learn HOW TO DRAW WADDLES from Gravity Falls in less than 5 minutes! In this step-by-step video lesson, you will learn how to draw it QUICKLY and EASY