Learn How To Draw Grapes Quickly
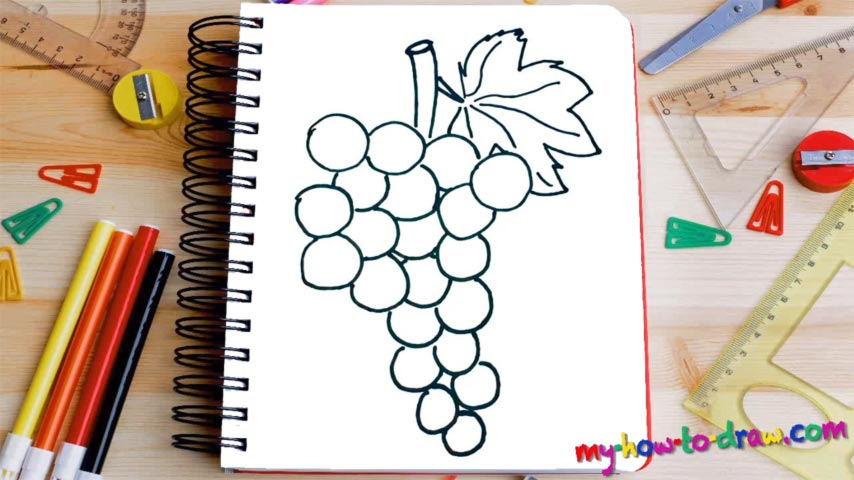
This is, by far, one of the easiest lessons on our website. Essentially, it’s just a combination of circles of different sizes and a leaf at the very top – that’s it! I promise you’ll have tons of fun during this how to draw Grapes tutorial, though. Start in the upper corner of the paper with the highest line of grapes (00 min 07 sec).
Overall, there are seven “levels”, and the last three in the bottom have only two circles. Keep an eye on my example and try to be as accurate with the shapes and the sizes as you can. But, of course, that’s super important. Just create a believable image and you’ll be alright! The second level is a bit “narrower” (00 min 33 sec).
The two below it are basically the same. The leaf, the last step in this how to draw Grapes tutorial, sits in the upper corner (01 min 28 sec). The “stick” comes first. The leaf itself looks like it belongs to a maple tree (01 min 38 sec). It’s located in the right corner.
Before you learn how to draw Grapes, did you know?
Tasty, sweet, and quite good for your health, grapes are considered to be one of the finest fruits on planet Earth. Botanically, a grape is a berry, but we’re all used to treating it differently. The best way to eat it is raw (fresh, that is). However, people use grapes to make juice, jam, vinegar, and, of course, wine (one of the best ones out there, by the way).
According to the historians and the scientists, our kind started cultivating this beautiful fruit 6-8K years ago. As for oldest winery in the world, it was found on the territory of modern-day Armenia. It dates to around 4000 BC. Grapes are quite cheap and available to a vast majority of the planet’s population. Plus, they look and smell amazing.