Learn How To Draw Eevee Pokemon Quickly
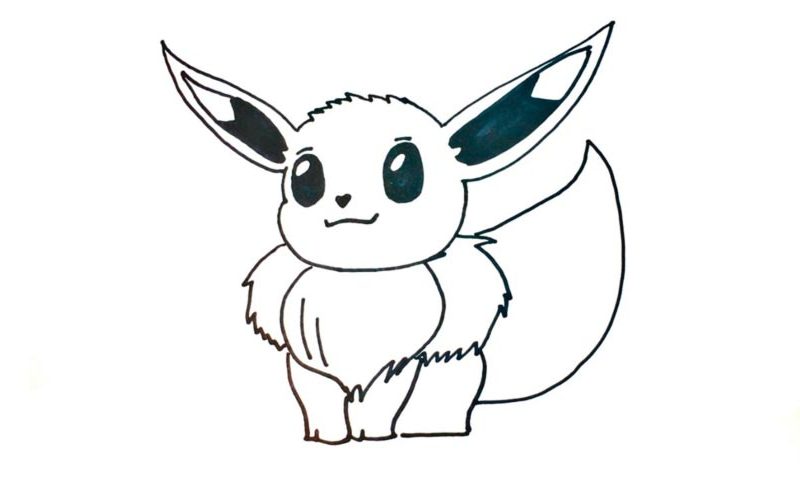
The cute eyes come with big white spots in the upper left corner (the rest should be colored black) (00 min 06 sec). Begin this how to draw Eevee Pokemon tutorial with the right eye and gradually move to the other one. The brows are small and sit very close to the eyes (00 min 50 sec). The nose looks like a tiny heart (01 min 00 sec).
For the mouth, you’ll need one basic line at the bottom. So, with the facial features in place, it’s time to take care of the head. The lower half is all about curves (01 min 18 sec). Before getting to the top, add the huge ear on the right (01 min 28 sec). It’s truly big and very sharp but easy to draw. The left part should be colored black. Same goes for the other ear.
The top of the head is fluffy (02 min 15 sec). That’s also true for the shoulders, the next step in this how to draw Eevee Pokemon tutorial (03 min 22 sec). The main body looks like a bulb. The feet are very basic, not a problem for us (03 min 36 sec). The gorgeous tail completes this video (03 min 54 sec).
Before you learn how to draw Eevee Pokemon, did you know?
As one of the cutest Pokemon to ever walk the Earth, Eevee is a super-popular character that’s featured in numerous books, shows, movies, and merchandise. Just take a look at that tiny beast: isn’t it absolutely adorable? The folks over in Japan know exactly how to come up with creatures that take your breath away.
AKA Evolution, this is a very special brute, as it can transform into 8 different Pokemon because of its unique origin (it has a pretty unstable and messy genetic code). So, even though it does look harmless, Eevee can be a serious opponent and shouldn’t be underestimated under any circumstances. Watch out for those big ears and the fluffy tail!
