Learn How to draw Deadpool Quickly & Easily!
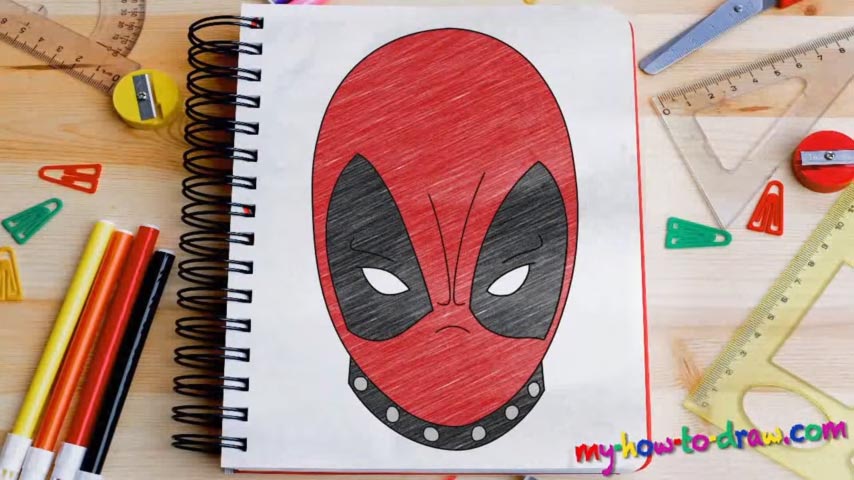
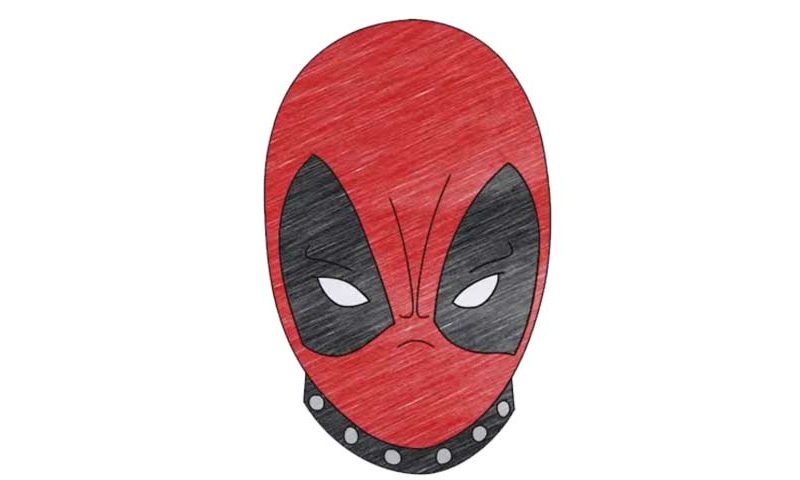
Let’s make one thing clear right from the start: we’re drawing the head of this crazy guy, not his entire body. And now that we’re on the same page, let’s learn how to draw Deadpool, shall we? The rough sketch will be relatively easy, as it doesn’t feature tons of sophisticated curves and shapes. Still, pay attention to the details and get it right.
Basically, we’ve got a huge oval shape in the middle that represents the hero’s head (01 min 15 sec). This is a universal approach, so, once you master it, you’ll be able to draw Spider-Man, Ironman, and all the other valiant fellas you find on the pages of comic books. Divide the head using two lines and mark the eyes (01 min 30 sec).
If everything looks good, move on to the next stage of this how to draw Deadpool tutorial – the clean drawing. Again, the head comes first (02 min 31 sec). Basically, just go over the guiding oval but make sure the new one is much smoother. The eyes come next (02 min 55 sec). They are big, pointy, and pretty much identical.
Once those are done, you’ll be almost finished with this guide. Add the eyebrows on top of each eye and accentuate the man’s frown with two curves right between the eyes (04 min 09 sec). Add an even simpler curve for the nose. The “collar” is the final part of this how to draw Deadpool tutorial (04 min 32 sec). Add six circles in total; clean the rough sketch and use a combination of black, white, and a lot of red to color this superhero.
Before you learn how to draw Deadpool, did you know?
It’s safe to say that this is the most self-aware comic-book character in the world. He knows exactly what’s happening around him, including the fact that he’s the main character of a fictional story. The recent movie adaptation proved that this funny hero can look great on the big screen and please the audience with a never-ending flow of action and fun.