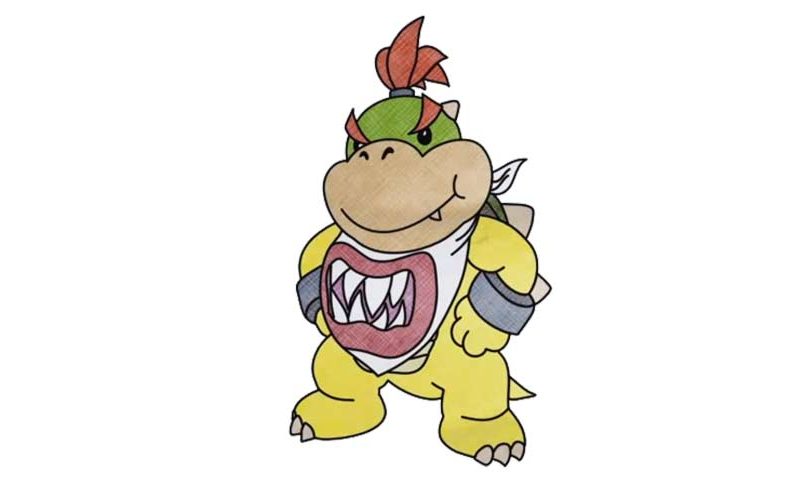
Learn How to draw Bowser Junior Quickly & Easily!
We begin with the lower part of the head – the jaws and the nose (00 min 26 sec). It’s not a complicated shape, but do make sure it looks exactly like the one in the video. The nostrils are tiny and simple. The next part of our how to draw Bowser Junior tutorial, the eyebrows, follow (01 min 10 sec). The eyes are a lot smaller than the brows, and make our character look like one of the Teenager Turtles.
But once you add that fancy hair on top of his head, Bowser will start to look like the beast that he is (01 min 50 sec). Once that’s in place, move on to the body (02 min 10 sec). See that nasty mouth on his shirt? Get to it first. The teeth should be big and scary. Plus, they should all be different in size to accentuate the “savage” nature. Everything looks good? Ok, let’s proceed with this how to draw Bowser Junior tutorial then.
The left hand is a piece of cake (03 min 16 sec). The right one is a bit more complex; still, they’re both quite simplified and easy to draw. The final parts are, of course, the mighty legs (04 min 07 sec). The character has a big gap between his legs, which means he’s standing strong on both feet and ready for some action. Keep that in mind while working on this last part, Ok?
Every foot has three toes. And, there’s a tiny tail hiding behind the right leg (04 min 55 sec). Alright, that’s it for this tutorial, dear friends! I recommend using my color combination for the beast because it is the one used in the game.
Before you learn how to draw Bowser Junior, did you know?
This guy is the famous Bowser’s one and only son. As a prince and the rightful heir to his father’s kingdom, he’s got certain responsibilities. Folks around him expect Bower Jr. to do incredible things, and sometimes, the pressure is just too much. However, he manages to overcome all the difficulties and is actually a bigger villain than his old man.