Learn How to draw Bonnie FNAF Quickly & Easily!
At this point, you probably already know that good-quality drawings go hand-in-hand with rough sketches. They simply won’t be equally accurate without them. Same goes for this how to draw Bonnie FNAF tutorial (00 min 24 sec). If you’ve been keeping up with our videos, then you already know the drill: A huge oval in the middle for the main part of the composition and two lines inside of it to define the facial features.
That’s the first step. The second involves creating four tiny circles in all four corners of that oval (00 min 41 sec). That’s it for the intro! As for the actual drawing, begin with the nose (just like we did in all the other FNAF-related tutorials) (01 min 07 sec). Gradually move to the eyes and eyebrows (01 min 29 sec). The eyes consist of four circles and one simple line.
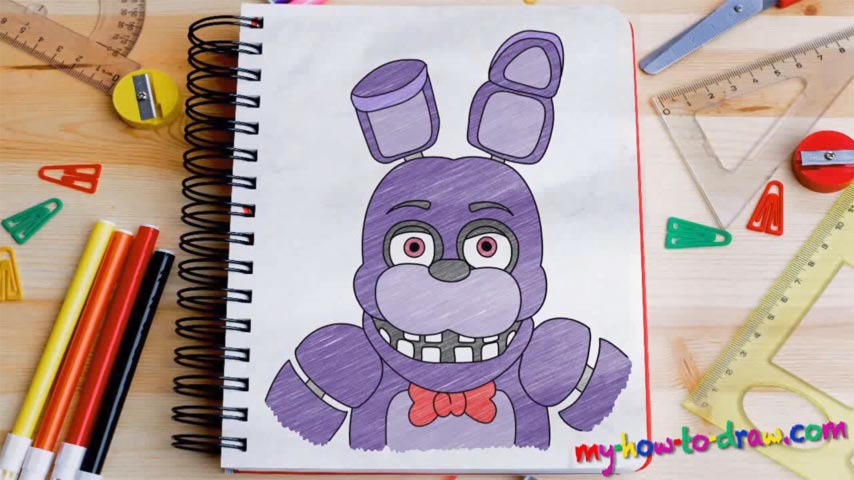
The next step of this how to draw Bonnie FNAF manual is the upper part of the head (02 min 48 sec). Once you’re done, move to the bottom and put in the scary teeth (03 min 11 sec). You’ve got four of them on top. There are six at the bottom, and they are considerably bigger (03 min 40 sec). If the face looks good, move on to the ears (04 min 22 sec).
The right one is more sophisticated and has two “levels”. The final stages of the tutorial are the chopped hands and the upper body (05 min 59 sec). The hands are pretty much identical. Don’t forget to draw that fancy bowtie at the very end. If you’re happy with what you’ve got, delete the light strokes and color the character using purple, red, black, and white.
Before you learn how to draw Bonnie FNAF, did you know?
Long ears, a purple body and a set of eyes that look directly into your soul. That’s the best description for Bonnie. This character is one of the most active animatronics and will follow you in almost every single location. Plus, he can turn the camera off. So, watch out for this smart villain – he might be standing right behind you!