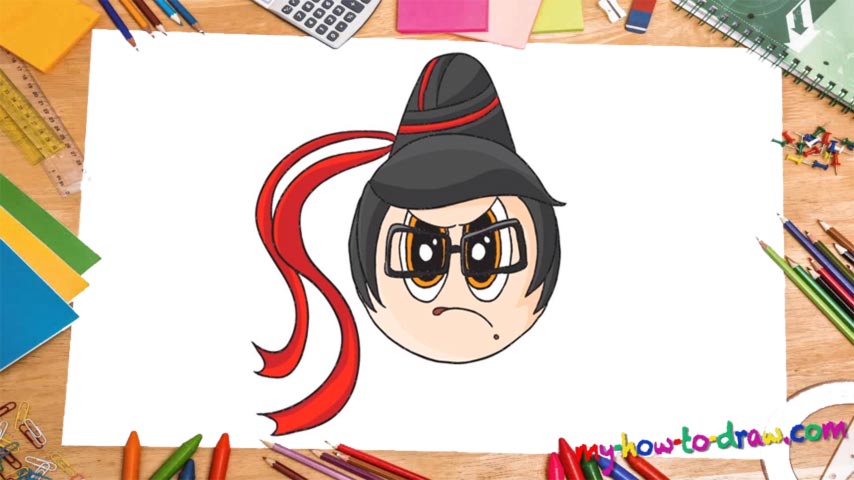
Learn How to Draw Bayonetta Quickly & Easily!
This feisty young lady is lethal not only with her blades but also with her looks. Let’s try to work on that in our how to draw Bayonetta tutorial. As always, use light strokes to draw some guides. We’ll need a large circle in the middle (00 min 19 sec).
Next, add a “+” right in the middle of that circle and two equally-sized ovals on both sides (00 min 33 sec). After you’re done with preparations, go for it! Start with the mouth (00 min 45 sec). The girl’s hair should come next (01 min 01 sec). Once you’re finished with that, move on to the glasses (01 min 55 sec).
The eyes are pretty easy to draw: create the curvy upper parts and use the rest of the ovals we made in the beginning to finish them (02 min 34 sec). Happy with the face? Then let’s move on to the last part of our how to draw Bayonetta tutorial – the rest of the hair (03 min 52 sec).
The cone-like hair on top of her head is easy. The ninja-like headband is the hard part (04 min 30 sec). However, if you think about is as a number of “S” shapes, it will become one of the easiest parts. Don’t forget to go over the painting at the end and erase the guides (05 min 12 sec).
Before you learn how to draw Bayonetta, did you know?
Bayonetta is the main character of a video-game franchise (also called Bayonetta, by the way). This beautiful girl is a witch with an attitude. At the same time, she’s a good person and fighting for the right cause.
The Left Eye allows her to see the darkness for what it is and fight it in ways others can’t. She’s been sleeping for about 500 years (give or take) and wakes up to fight her new enemies and learn the real truth about who she truly is. They took her sister away, and Bayonetta is ready to do whatever it takes to bring her back.