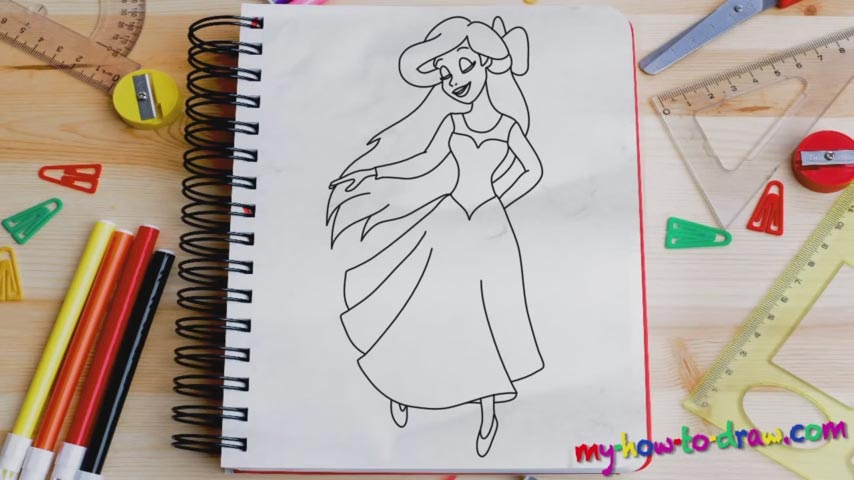
Learn How to draw Ariel Quickly & Easily!
Start this tutorial with the girl’s right eye (00 min 30 sec). Keep in mind that both eyes are identical and that they are shut. That primitive shape right below the left eye is the nose. Before you move on to the next stage of this how to draw Ariel tutorial – the mouth – make sure the lower part of the head is done (01 min 01 sec).
If everything looks good, use four curvy lines to shape the mouth. Remember: the lower lip should be considerably bigger than the upper lip (01 min 17 sec). Ok, now we get to the main part of this video-guide, the hair (01 min 17 sec). Begin with the ear and use a series of curvy lines to shape that gorgeous hairdo. Once that’s done, add the neck and get to the next stage of this how to draw Ariel tutorial – the body (02 min 17 sec).
It’s actually not that sophisticated and you’ll need long and simple lines to complete this part. After you’re finished with the blouse, get to the hands (02 min 58 sec). Again, they are quite easy to draw. The key is in using several strokes to get the various parts right. When you complete the hair, get to the final step – the bottom of her dress (04 min 05 sec). Follow the video and add those curves to create a realistic picture.
Before you learn how to draw Ariel, did you know?
This lovely young lady was first introduced to the world back in 1989 and is one of the most recognizable cartoon characters in the world. She is the 4th princess on the legendary Disney list and also the 1st non-human princess in the universe.
Furthermore, Ariel is the one and only mermaid to mother her own kid. That beautiful red hair is her trademark fashion choice. As for the super-long tail, it allows her to swim at incredibly fast speeds and feel at home in the biggest oceans of the world.