Learn How To Draw An Acoustic Guitar Quickly
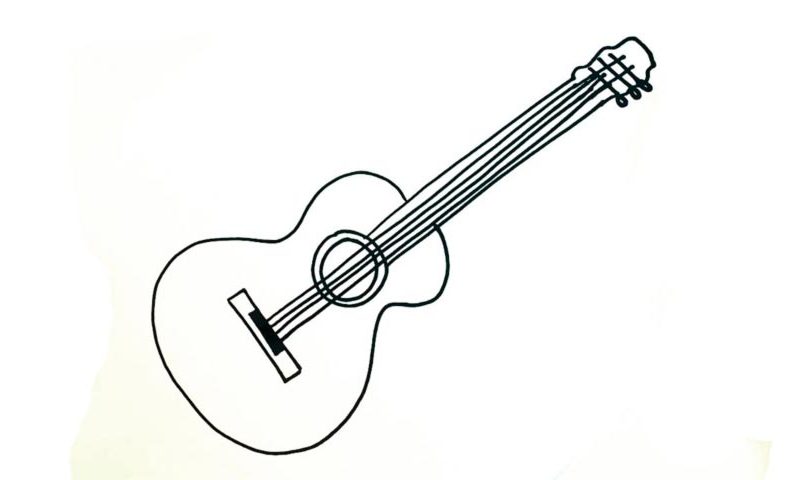
In this lesson, we’re going for a simple and straightforward drawing. The entire thing will take you less than 2 minutes, but once you’re done with the how to draw an Acoustic Guitar tutorial, you’ll be amazed by how great the final result looks. Follow my lead and start in the middle with the instrument’s body (00 min 09 sec). It looks a bit like a reversed light bulb.
Remember: both sides must look identical to each other to be realistic. The “hole” in the upper corner comes next (00 min 25 sec). Use two circles for this part. See that rectangular shape at the bottom of the guitar’s body (00 min 40 sec)? It’s there to hold the fret. The next step of this how to draw an Acoustic Guitar tutorial consists of several identical lines.
Begin with 4 lines that are pretty much equal is length (00 min 53 sec). The remaining two lines should start on the top of the hole we drew earlier (01 min 15 sec). The fret head is the final step (01 min 20 sec). After you add the pegs, the instrument will be ready (01 min 34 sec).
Before you learn how to draw An Acoustic Guitar, did you know?
They call the acoustic guitar the ultimate camping instrument. Even if you don’t know how to play it, you can always just strum the strings and sing along. As the name suggests, this guitar doesn’t rely on electric amps: the sound waves use its body to resonate and create music.
The very first acoustic guitars (or, at least, their close relatives) were introduced to the world in Spain in the 16th century. Later, France became the lead manufacturer of these types of guitars; a couple of years later, they managed to turn it into one of the most popular instruments.
