Learn How To Draw A Woman’s Hat Quickly
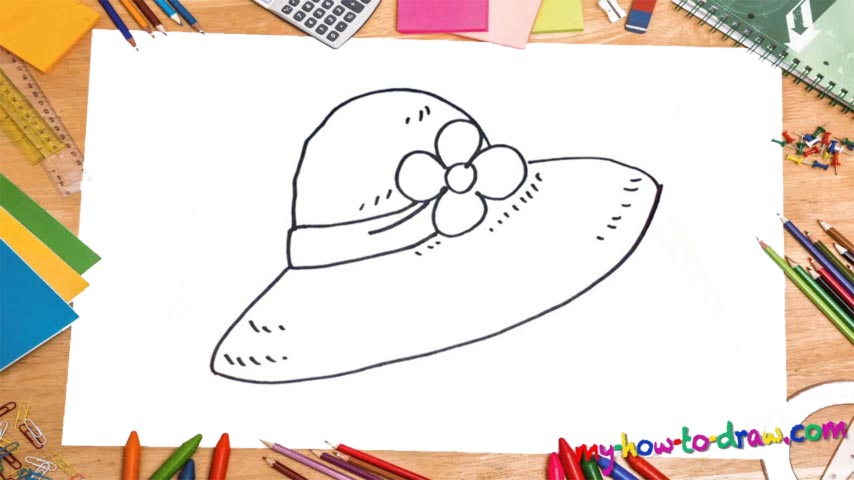
Start with a long and smooth line that will cover the bottom of the hat (00 min 08 sec). Next, add two similar-looking curves on both sides that make it look like a staple (00 min 16 sec). This is the intro to our how to draw a Woman’s Hat tutorial and it’s imperative that you get everything right here. See that shape on top of the one we just drew?
It’s the second step and sits above the first “level” of the hat (00 min 27 sec). The beautiful flower is located next to it and looks like a million bucks (00 min 37 sec). The tiny circle in the middle of it comes first. The leaves – four in total – follow. In case you didn’t know, this is quite a common “ornament” for these kinds of fancy lady hats. Ok, now it’s time to get to the final step in this how to draw a Woman’s hat tutorial.
All you’ll need to complete the upper half is a nice and round curve that starts in the right corner (on top of the flower) and reaches the far left end of the hat. Watch the video closely for an exact image (00 min 52 sec). And before you say goodbye, go ahead and add all those dots that you see all over the place (01 min 01 sec). They will make everything look better.
Before you learn how to draw A Woman’s Hat, did you know?
Some women look great wearing hats, while others don’t. It’s just a matter of luck and karma, I guess; same goes for the men. There are numerous styles when it comes to this “headgear”, and the one in today’s tutorial is nice and simple, without any sophisticated details.
It looks a lot like a flying saucer, by the way, and some folks even claim that the sci-fi authors were inspired by them when they came up with the original images of an alien battleship. That rose on the side instantly lets us know that it’s a woman’s hat and will be a great addition to a nice summer dress.