Learn How To Draw A Wolf Head Quickly & Easily
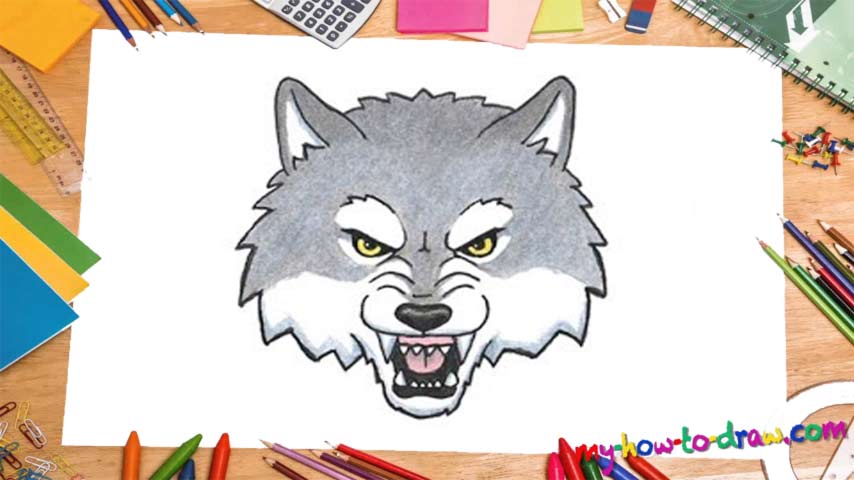
We’ll begin with the beast’s eyebrows (00 min 10 sec). Make sure they are nice and thick. The mesmerizing eyes sit right below them (00 min 44 sec). You’ll need two half-circles of different sizes for each. To make the brows look really big, add two jagged lines as we did in the how to draw A Wolf Head video tutorial (01 min 23 sec).
The nose looks a bit like a tiny heart (01 min 52 sec). See those wrinkles right above the nose? They will emphasize the growl of the wolf (02 min 42 sec). The teeth come next (02 min 53 sec). As you can see, it’s got two big teeth on the sides and four shorter ones in the middle. This applies both to the upper and the lower jaws.
Alright, the hardest parts of the how to draw A Wolf Head tutorial are done. All that’s left for us now is to work on the rest of the head (04 min 07 sec). Begin at the very bottom with the chin and use zigzag-like lines to outline the drawing. The pointy ears will complete the video-guide (05 min 12 sec).
Before you learn how to draw A Wolf Head, did you know?
Wolves are pretty scary, and they usually travel in packs, and that means you should NEVER provoke a wolf in the forest. They mostly live in North America and Eurasia. The average weight of a male reaches 45 kilograms, while the females are significantly lighter (up to 38 kilograms).
While they not the strongest predators on planet Earth, wolves are known to be extremely fast and flexible, with impressive stamina. Their fur is a work of art and is capable of protecting them from cold even during the harshest winters in the US and Canada. These days, there are approximately 300K wolves on planet Earth.